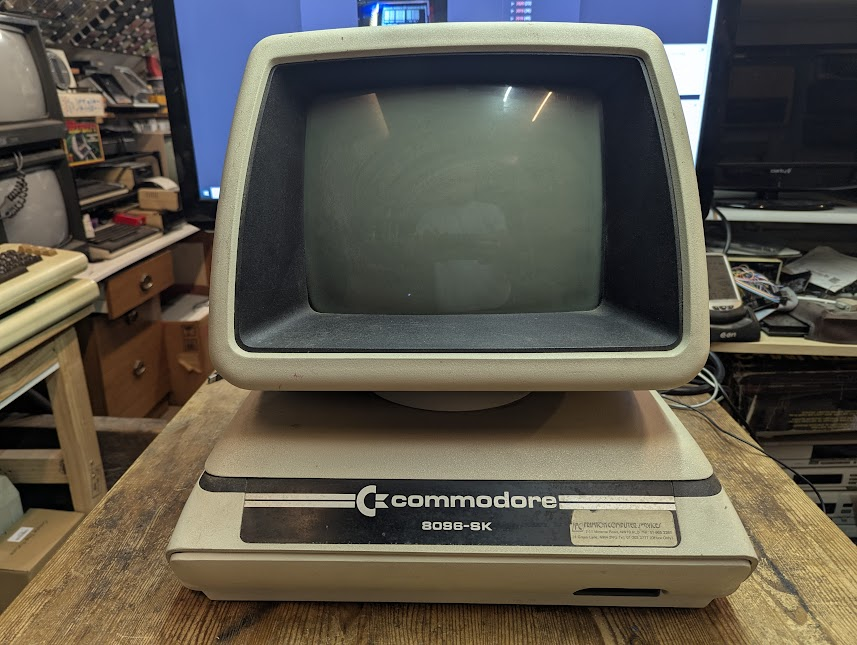
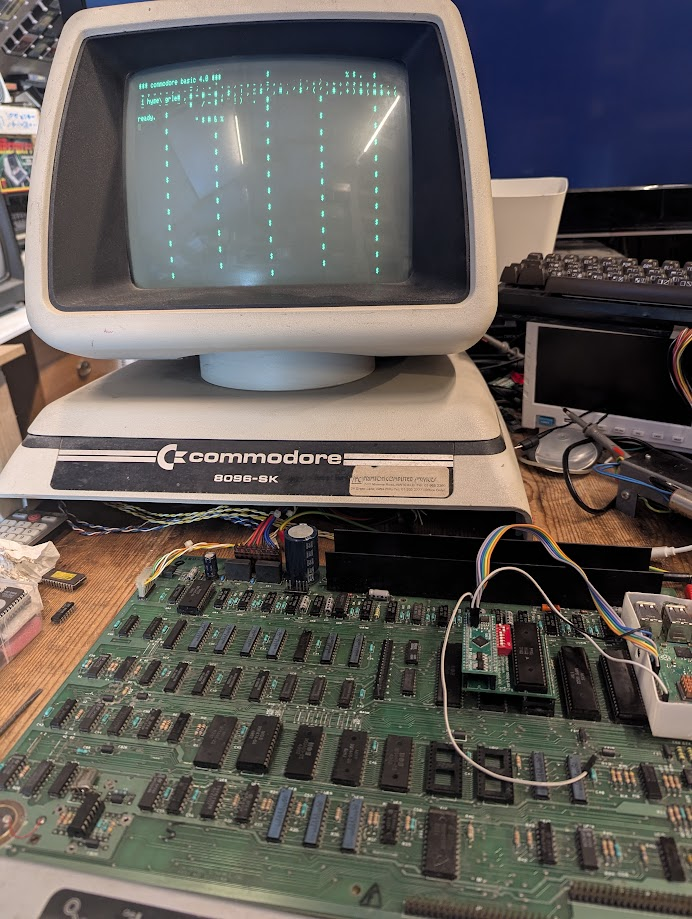
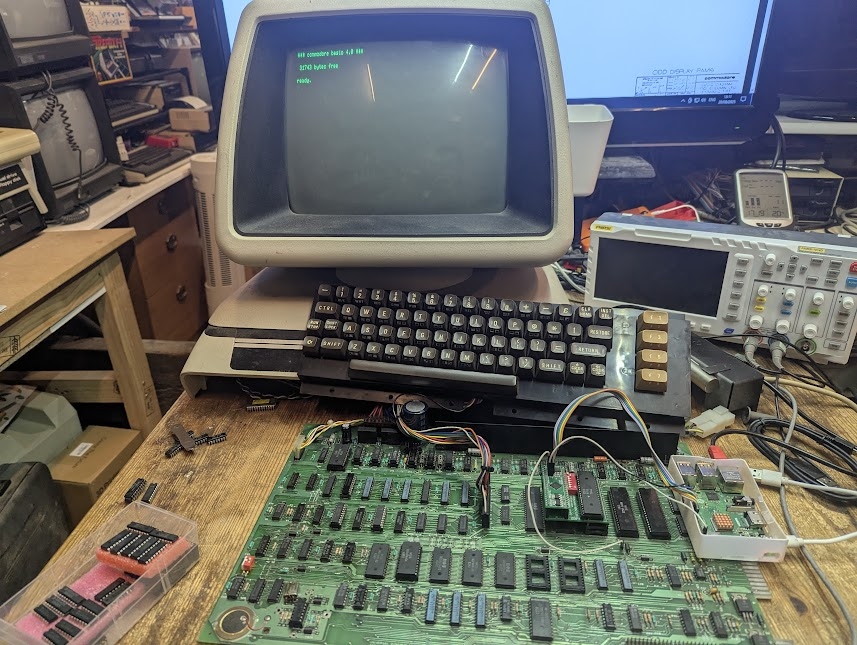
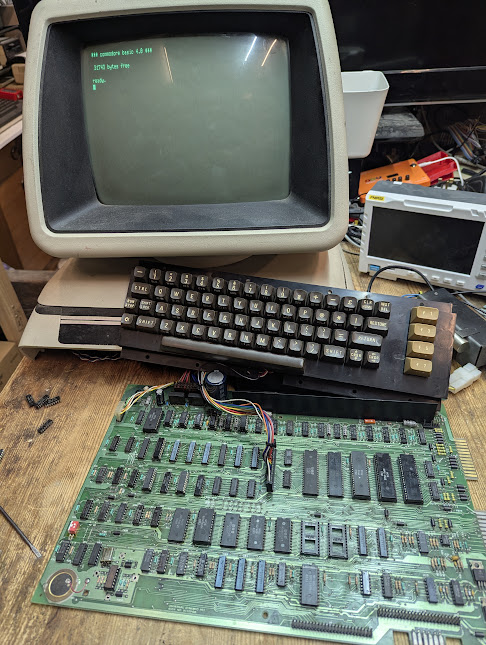
I purchased this Commodore Pet 8096-SK in need of serious repair back in 2019 and when I got it home I naively powered it straight on but it was dead, no chirp from the speaker and no static or noise from the monitor. My retro skills were very limited back then so I put it on a shelf as it looked rather cool.
6 Years Passed. Its Time…
Ok so it took a little time. I’VE BEEN BUSY 🙂
Sadly this PET is missing its keyboard which was one of the reasons it has taken so long to get to it as I thought I might find a keyboard for it. One or two did surface on ebay over the years but went for 100’s of pounds !!!.
My skills have improved somewhat in 6 years so I’m ready to tackle this one.
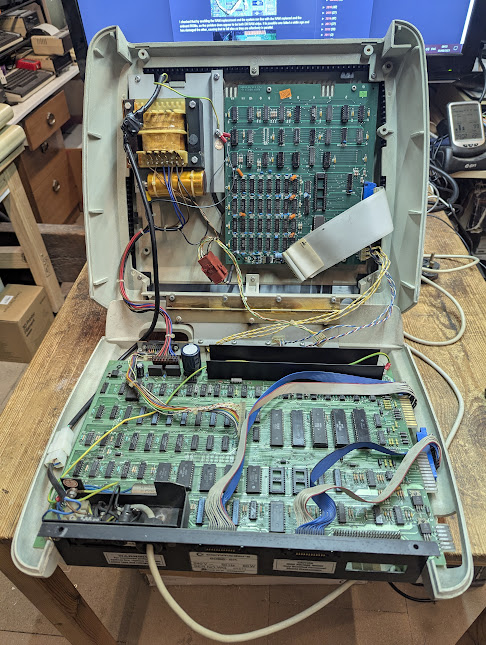
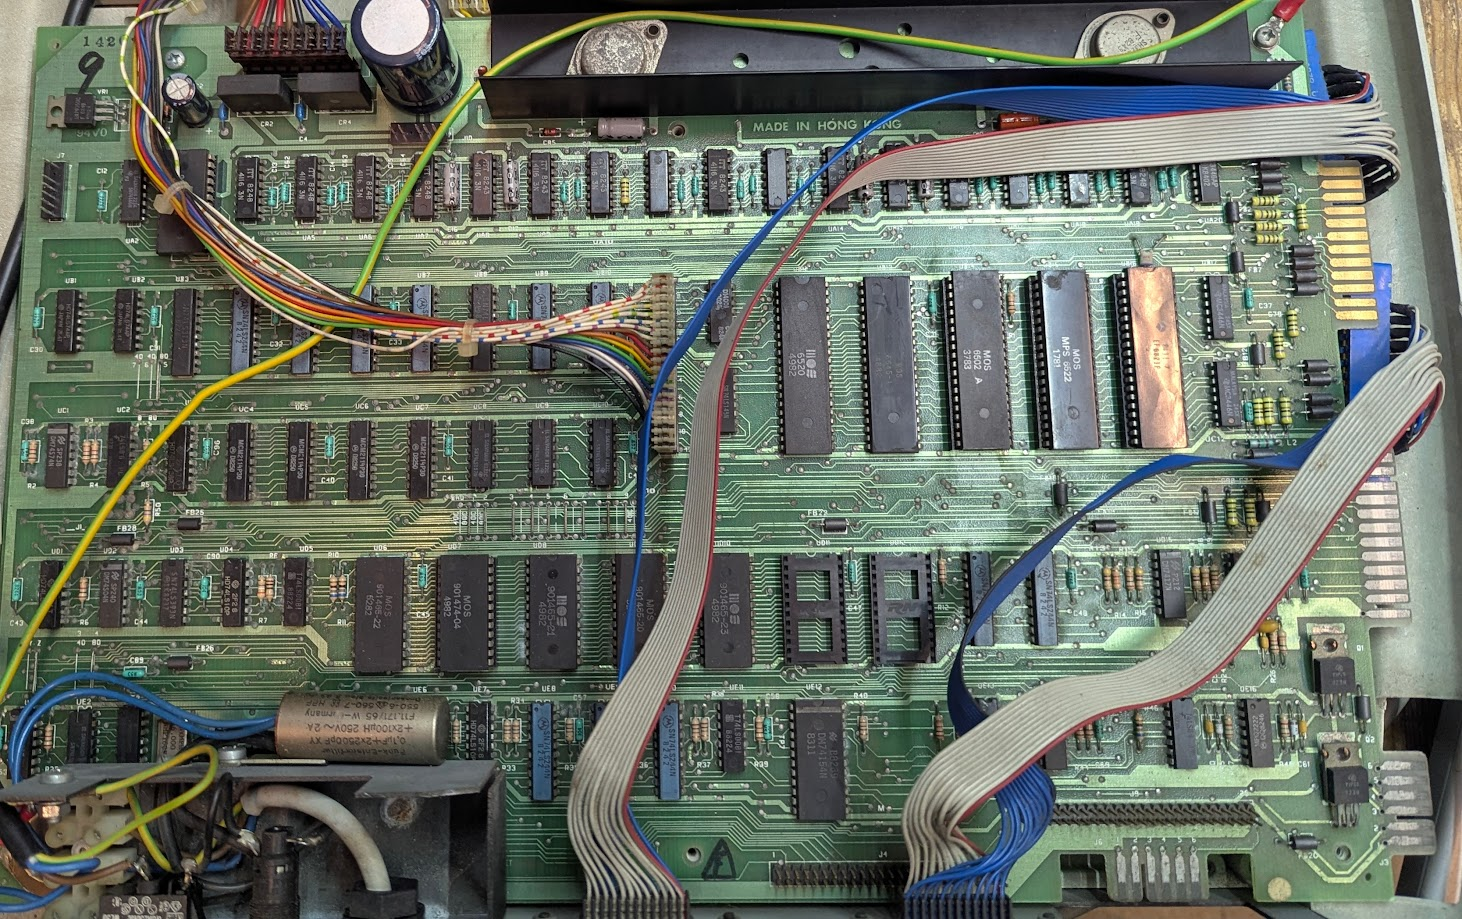
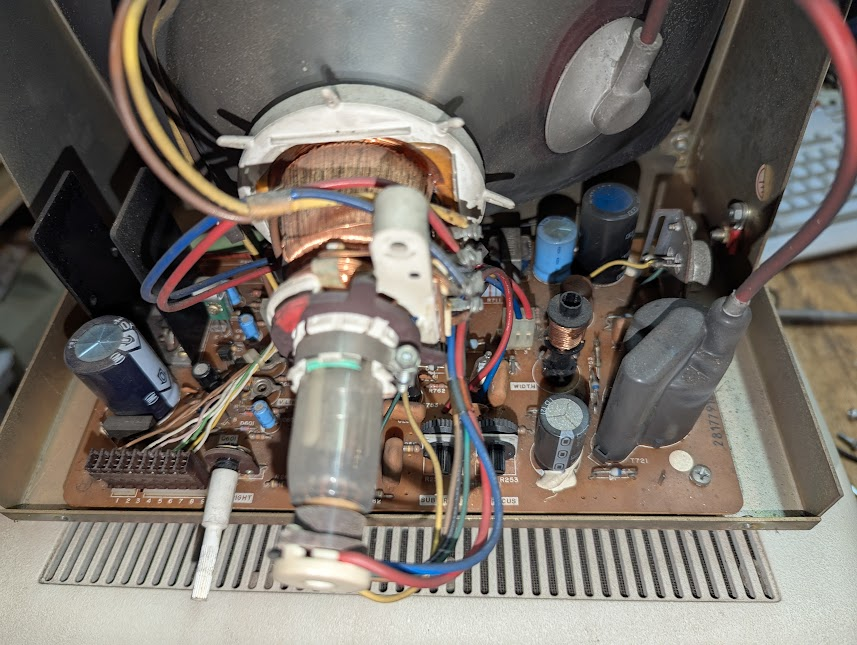
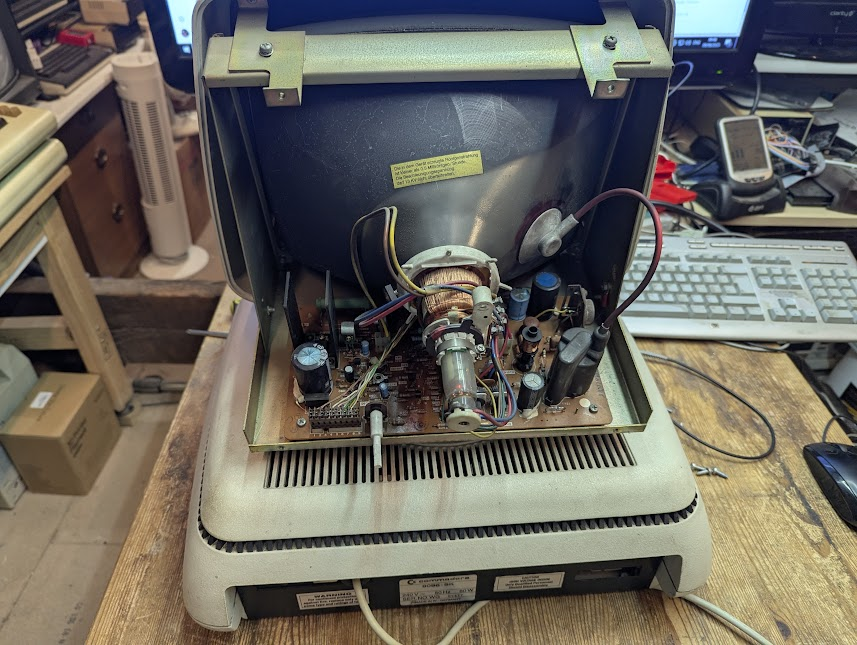
First thing was to give it a quick clean and crack it open.
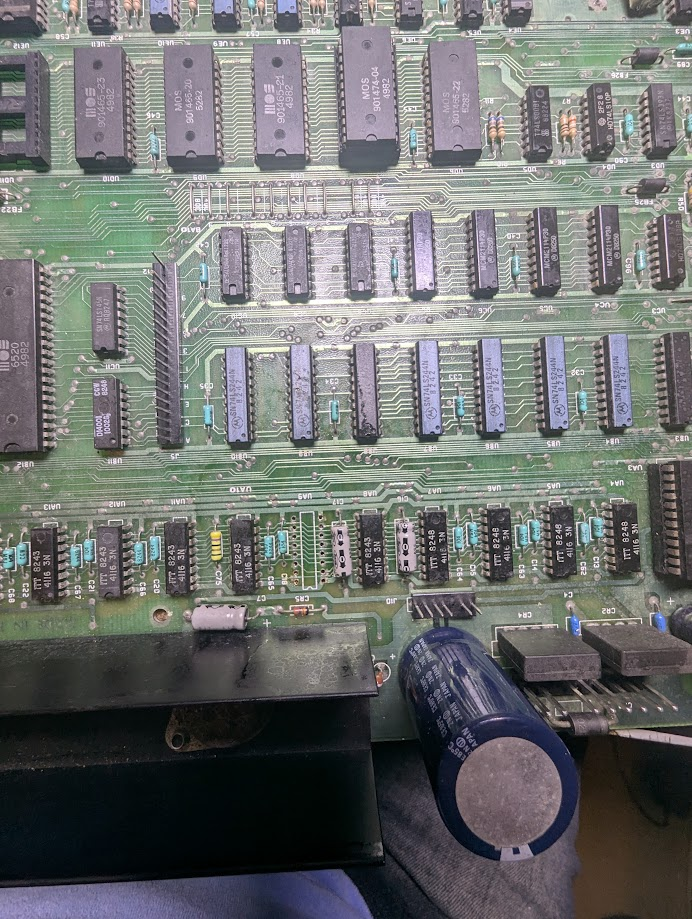
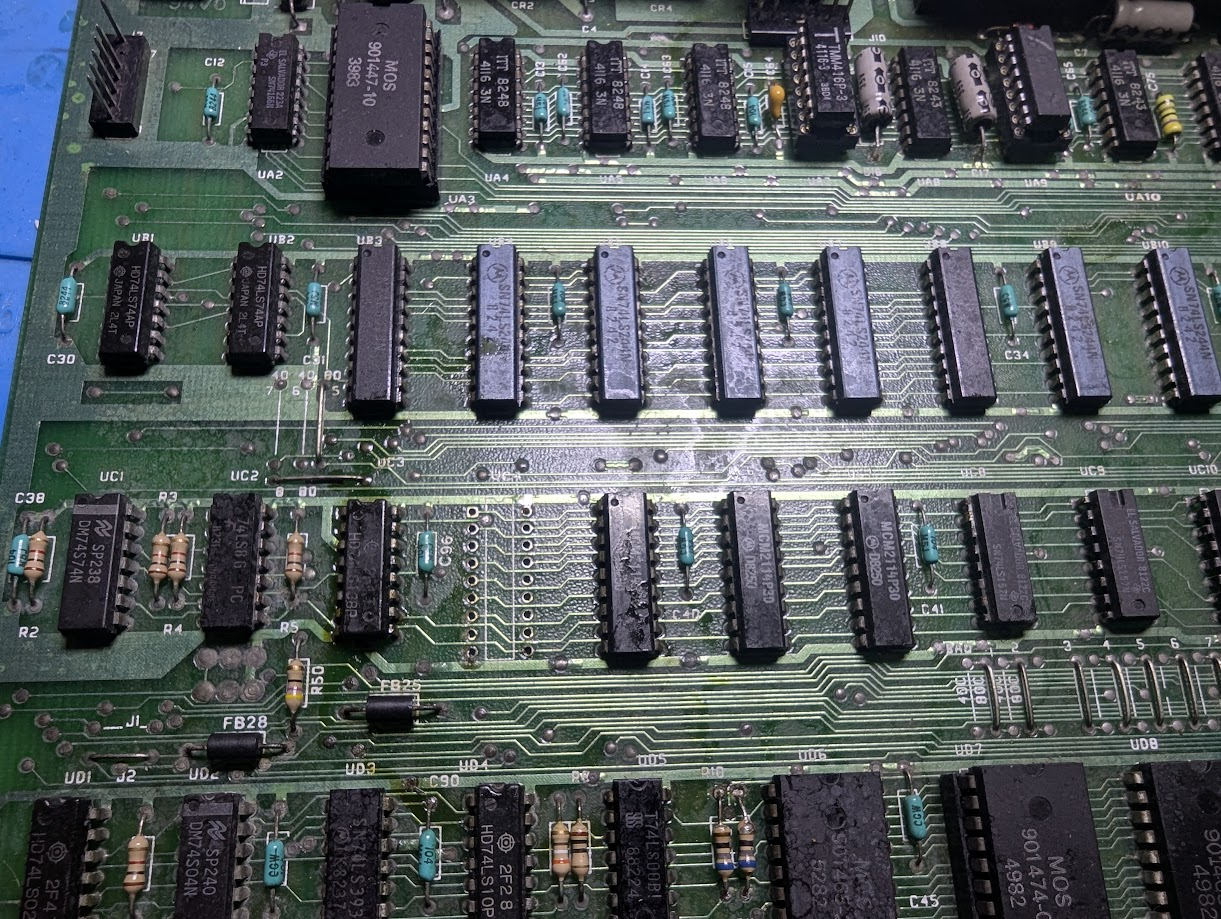
Inspecting the insides showed no obvious signs of failure.
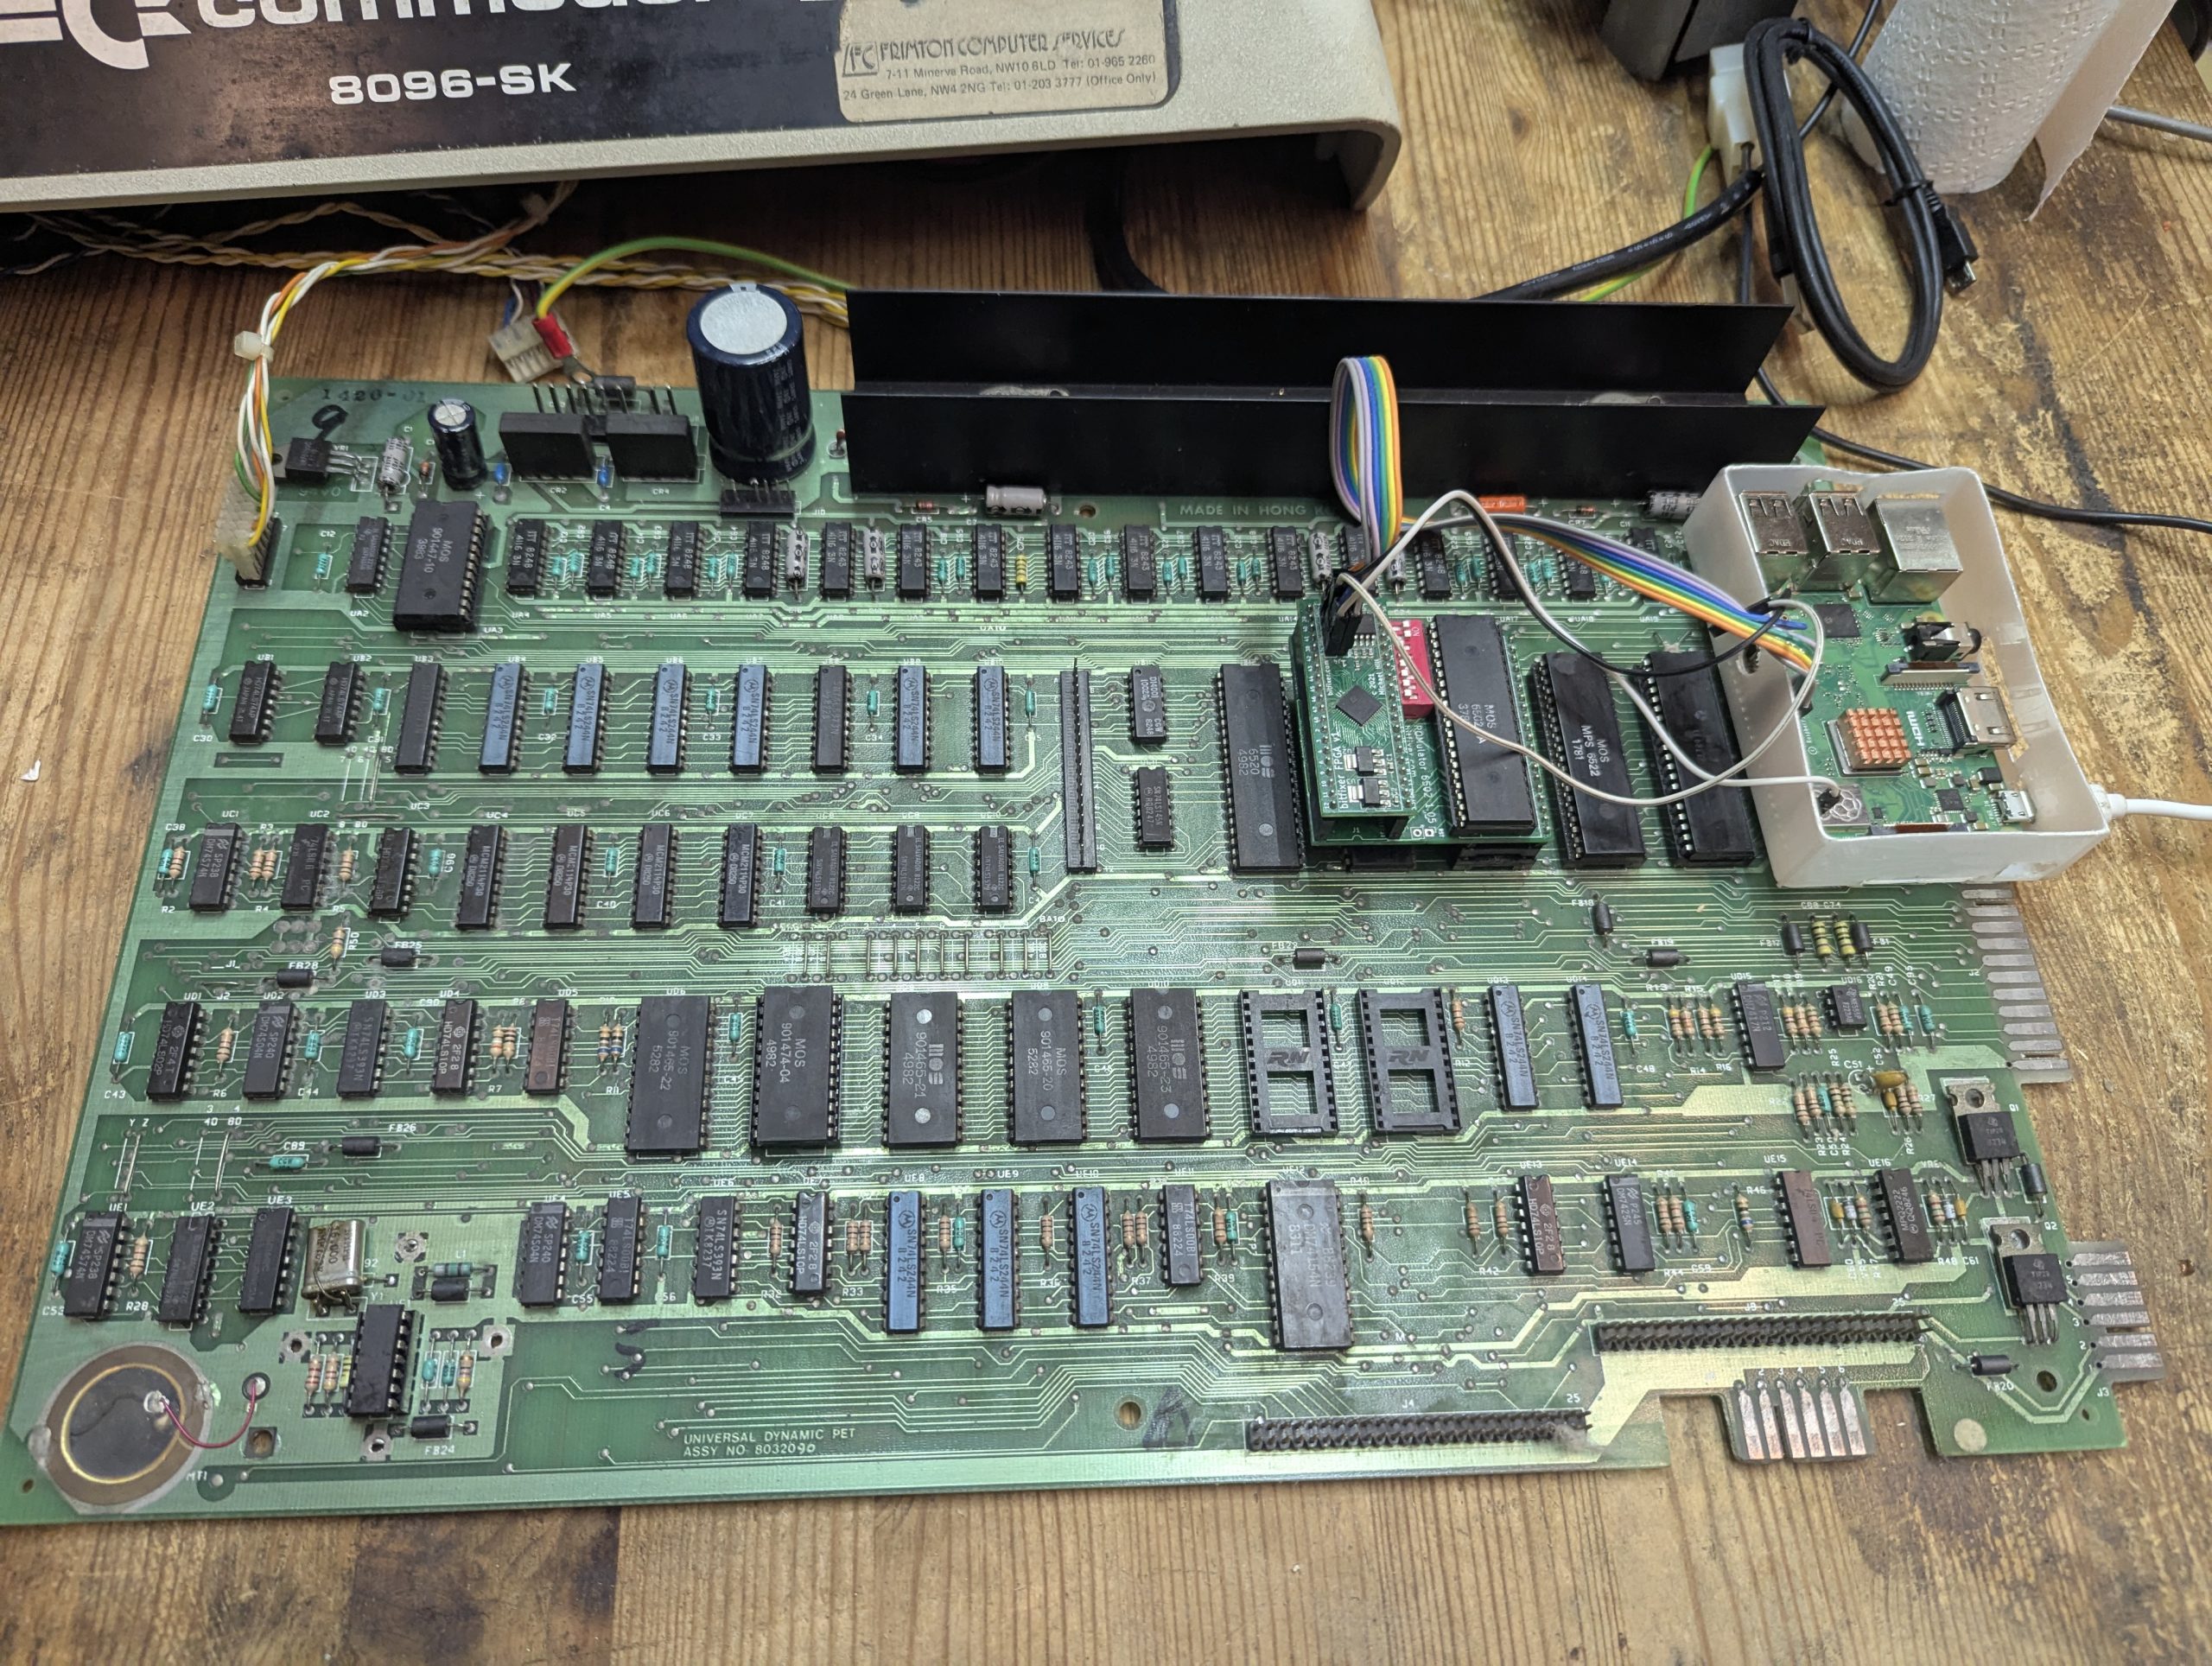
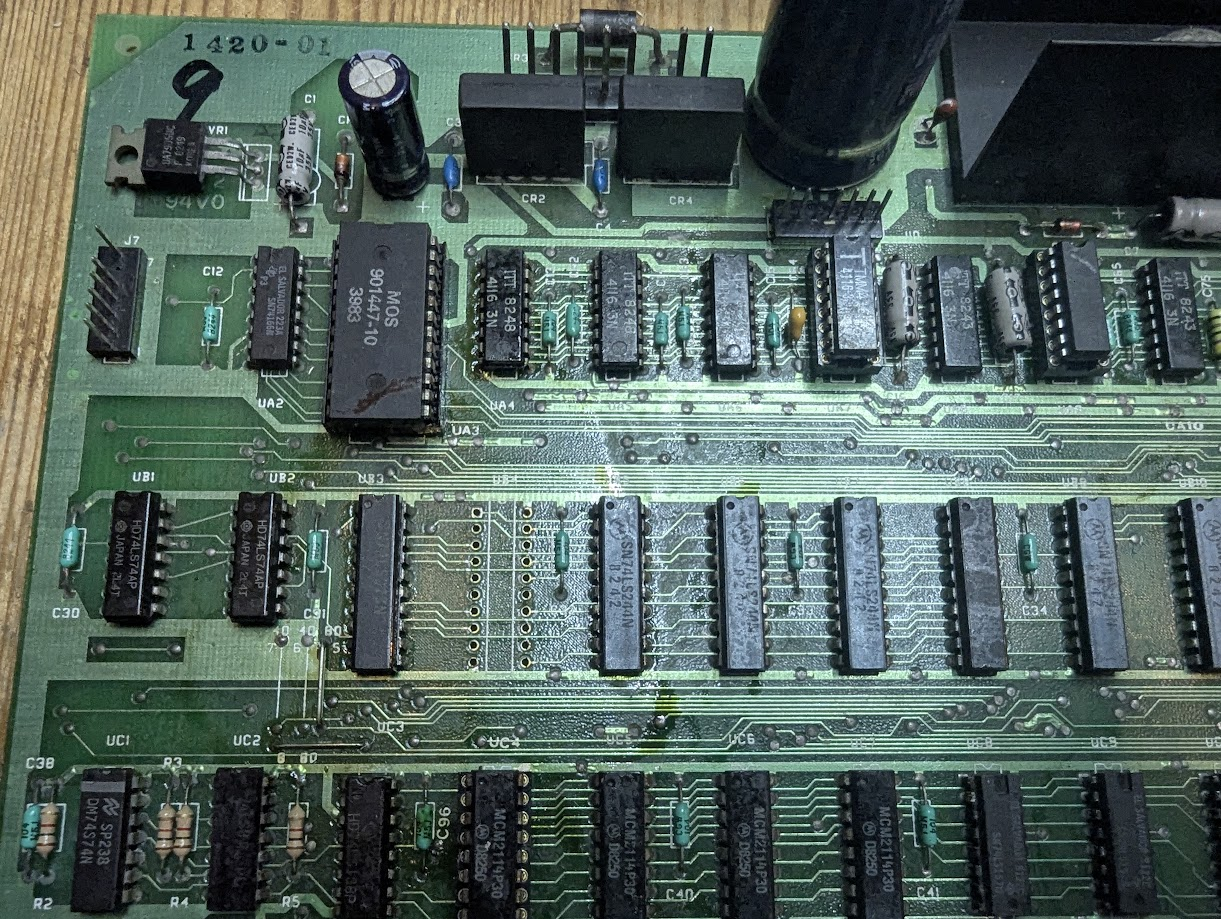
I notice there is two boards connected by a ribbon cable. Turns out the top board is a 64k ram expansion which connects via a CPU socket on the main board. This can be disconnected by transplanting the CPU to the bottom motherboard into the socket where the ribbon cable was plgged in. This will simplify troubleshooting by initially dealing with the main motherboard board.
Voltages
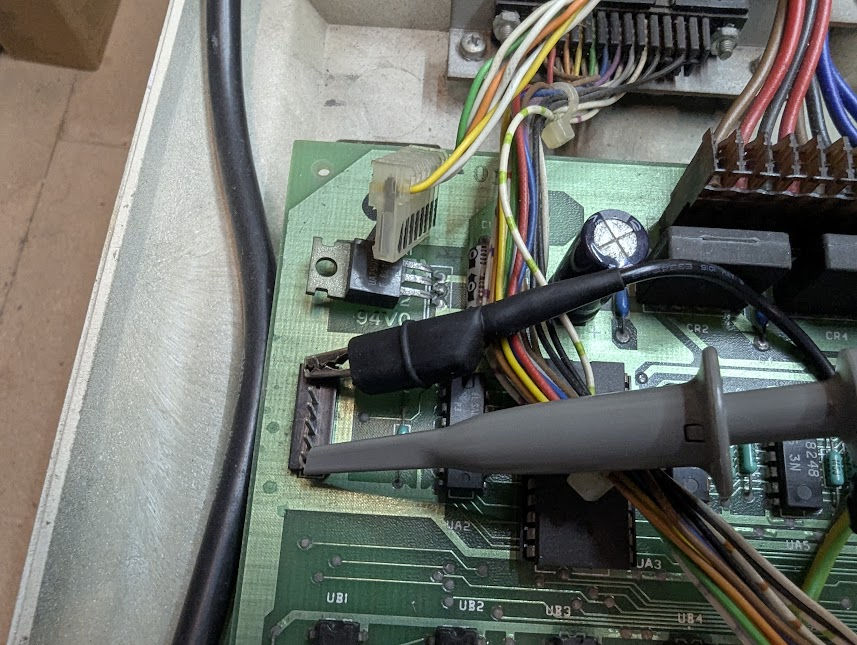
First thing is to see if we have any voltages around the board.
Test voltages 5v on Pin 8 cpu and Pin9 on ram and logic
-5v Pin1 , 12v Pin 8, on 4116 chips tested ok
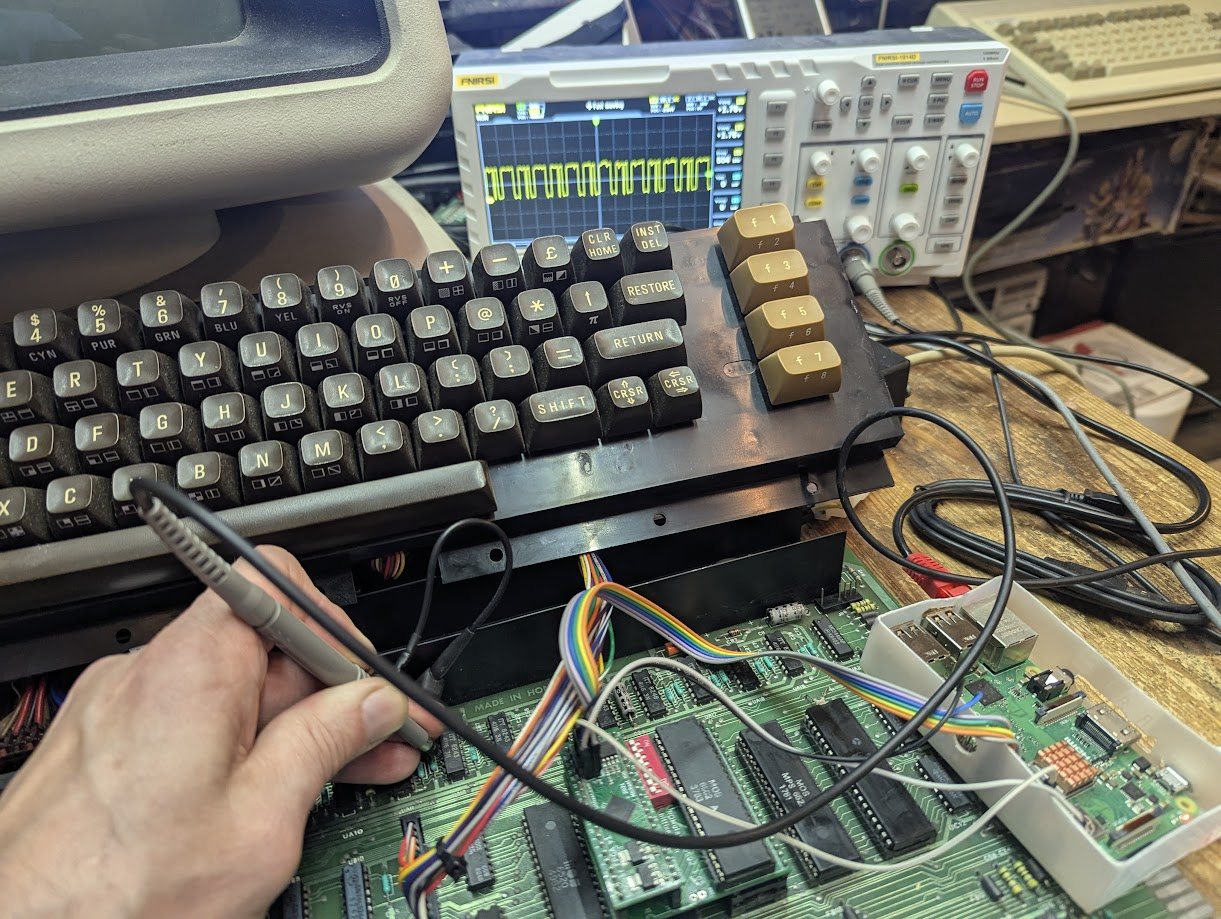
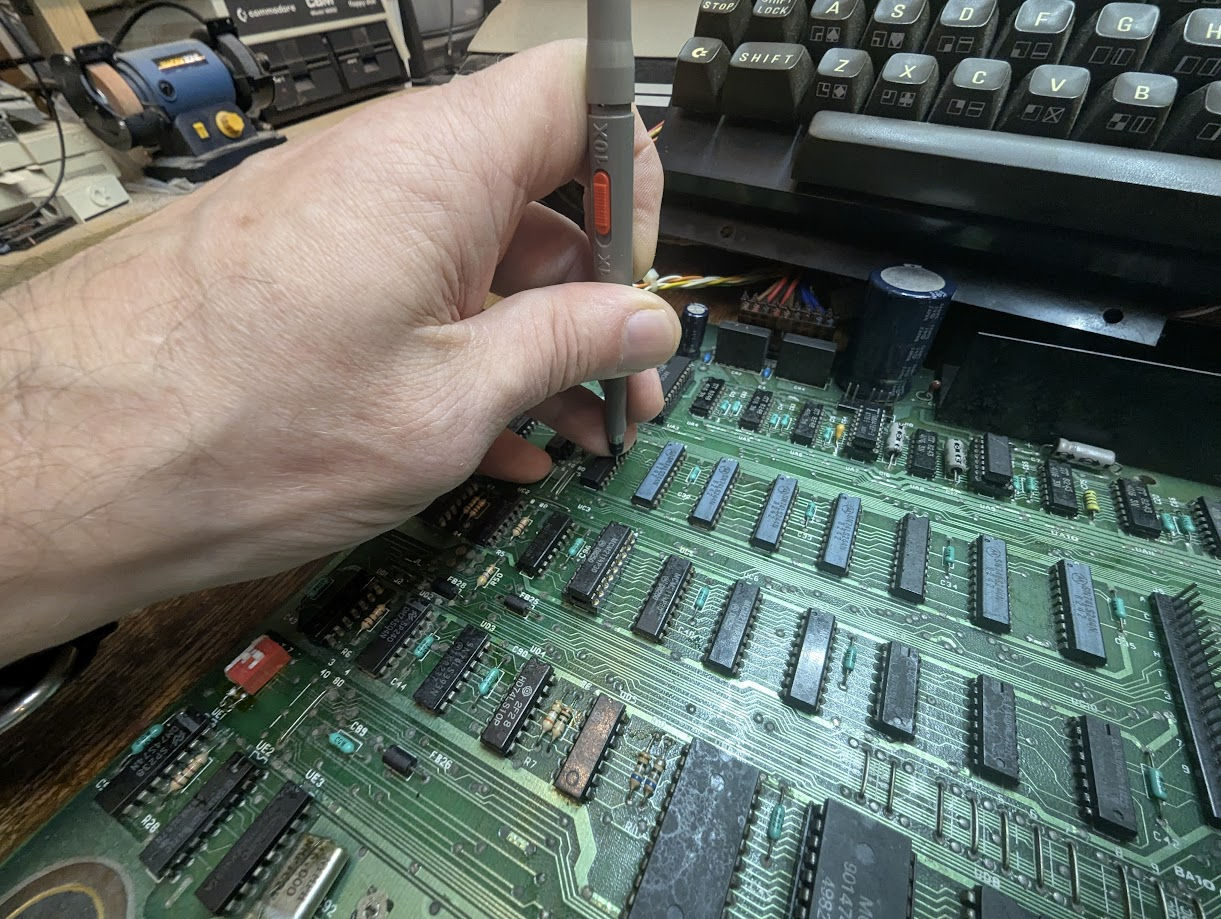
Test CPU Clock signal pin 3 and pin 39 as shown below
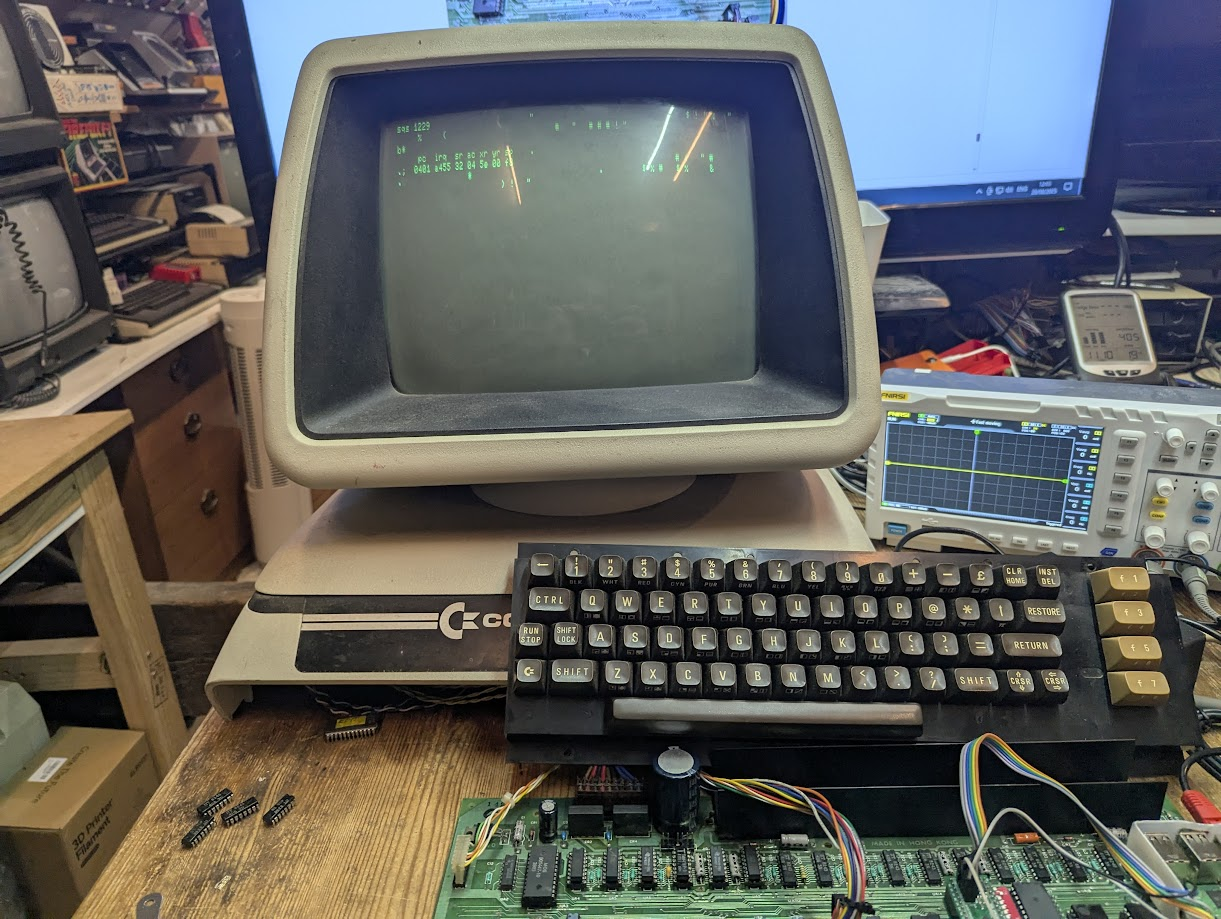
I decided to transplant the socketed chips i.e Cpu and 6522 into a Vic20

The Vic boots up ok. Loading through an SD2IEC tested the 6522 which works fine. so 6502 and 6522 are ok.

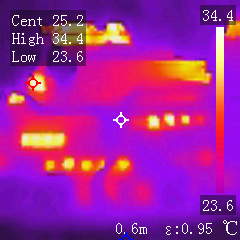
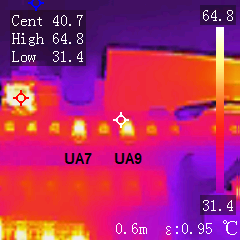
IR Heat looks ok and the chip temps all feel just slightly warm. This is good and bad as not really any more clues as to what is wrong with this machine but at least its not ready to burst into flames.
Bring In The Romulator
I have a device called a romulator which I used previously to troubleshoot a Vic20, Apple 2, Pet 4032 and others. This genius device allows simulation of ram and roms on various 6502 machines. It needs a raspberry pi to configure it. I configured it passthrough to the original roms and ram however the machine wouldn’t boot. Not a surprise as this configuration is acting as if the romulator wasn’t there.
I configured the romulator to use the romulators ram and use the original roms on the main board
and…..I get a chirp from the machine but no display. Hooray ! Progress. So the mainboard is working with life support from the romulator.
Rom Files
I can configure the romulator to use rom files instead of the roms on the main board so began collecting rom files for future use.
https://github.com/sjgray/cbm-edit-rom/tree/master/binaries/80-Column
https://www.zimmers.net/anonftp/pub/cbm/firmware/computers/pet/
Where’s the display?
Need to check if there is any video signal being generated for the monitor to display.
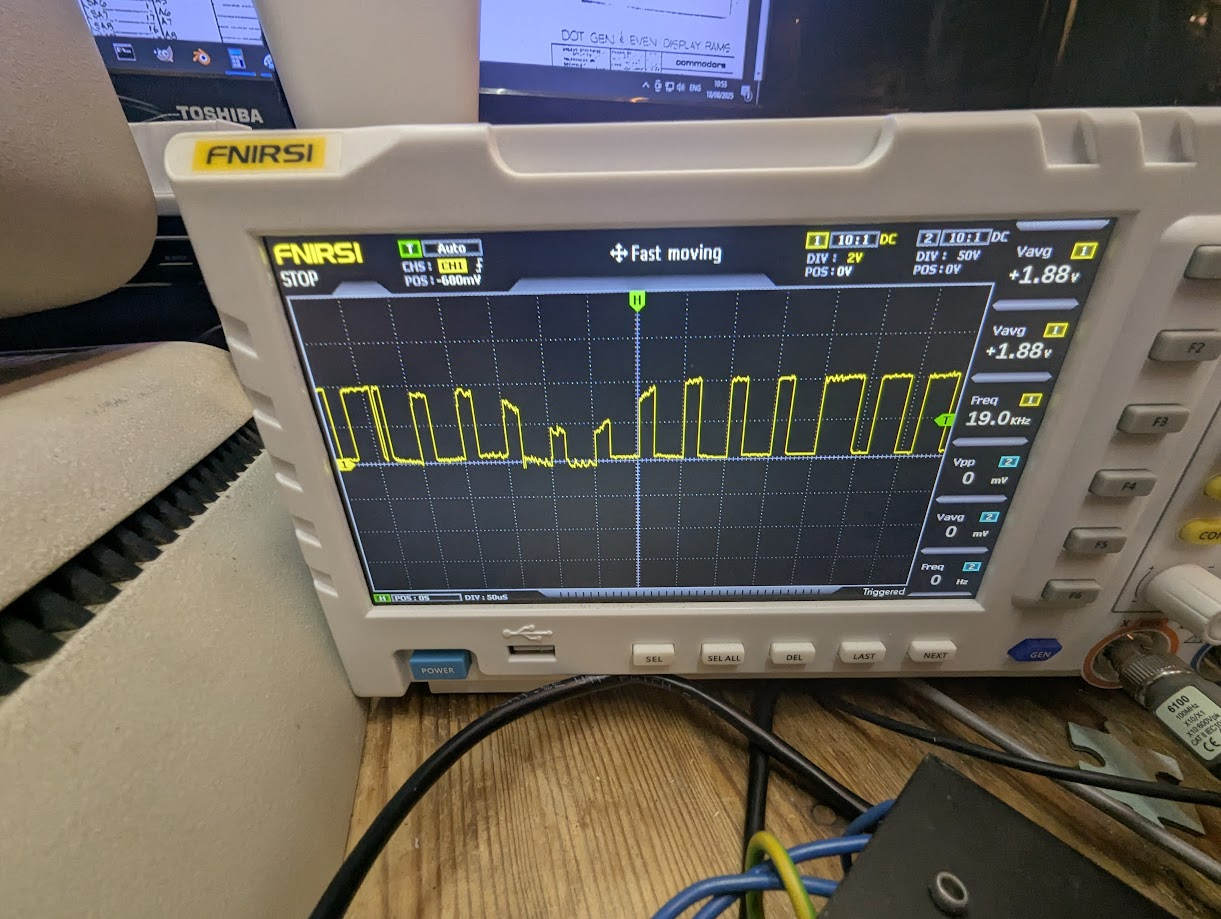
The J7 connector is the connection to the monitor. Top pin is ground and the bottom pin the horizontal drive which should be around 15.6 Khz and shown activity corresponding to pixels on and off.
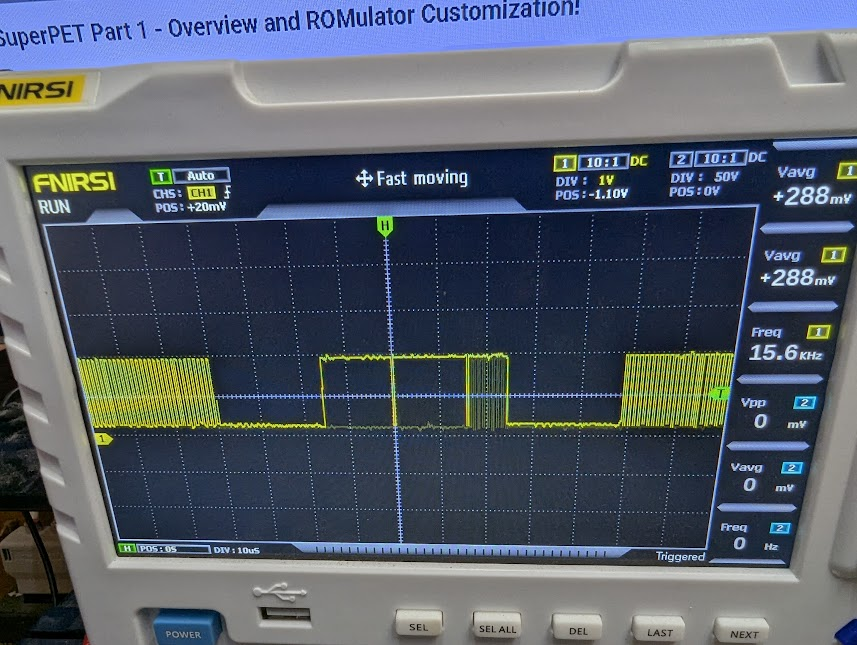
Good, there is activity so we should be getting a display therefore there must be something wrong with the monitor.
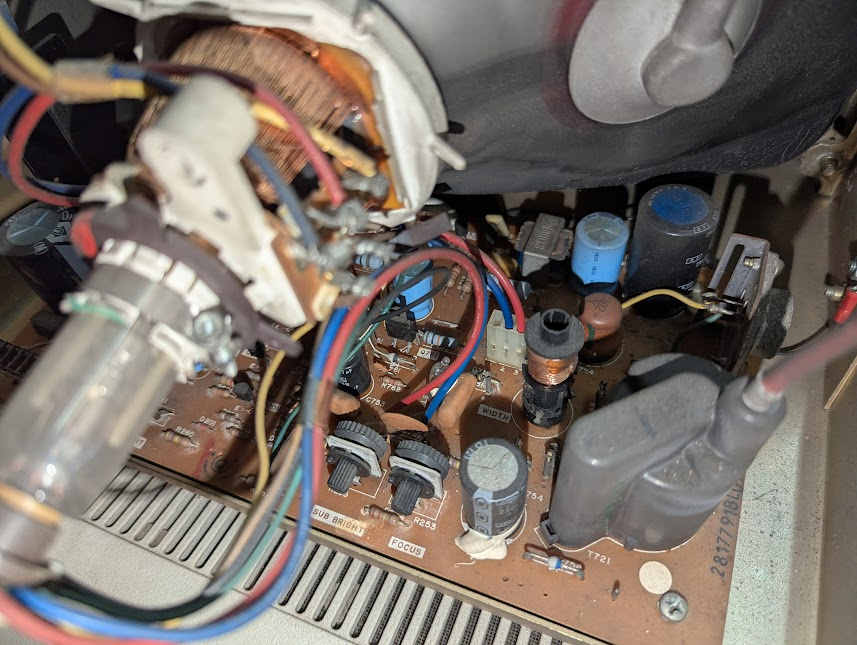
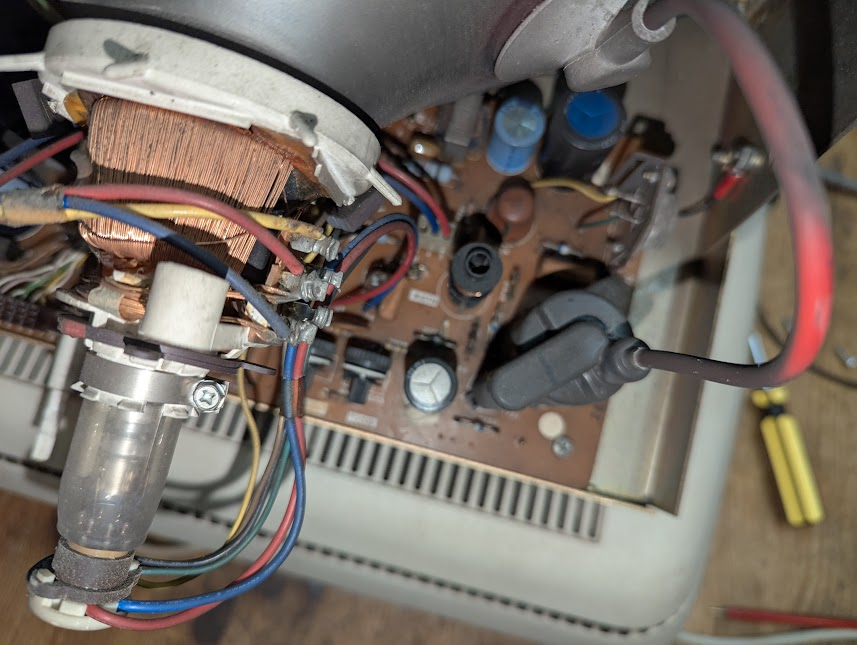
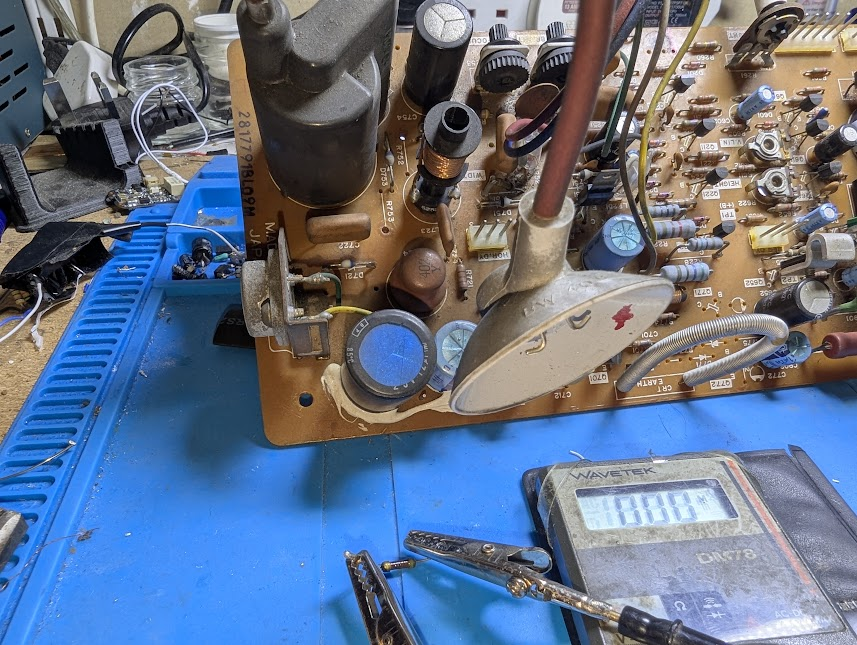
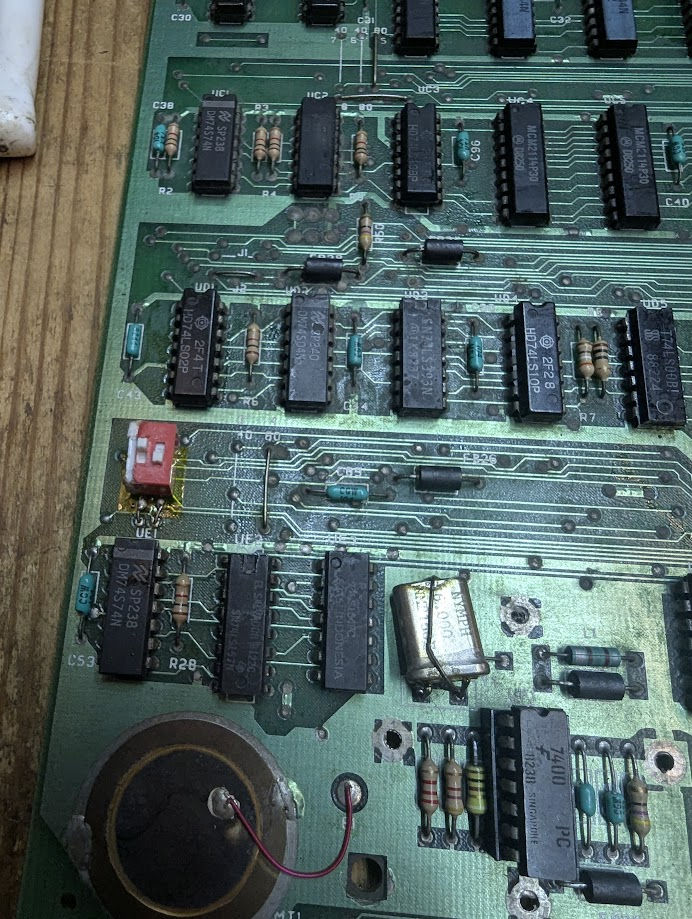
Monitor Board Troubleshooting
First glance all looks ok with no burn or scorch marks or burning smells.
There is a very common fault or rather couple of faults with this monitor. A couple of resistors tend to burn out.
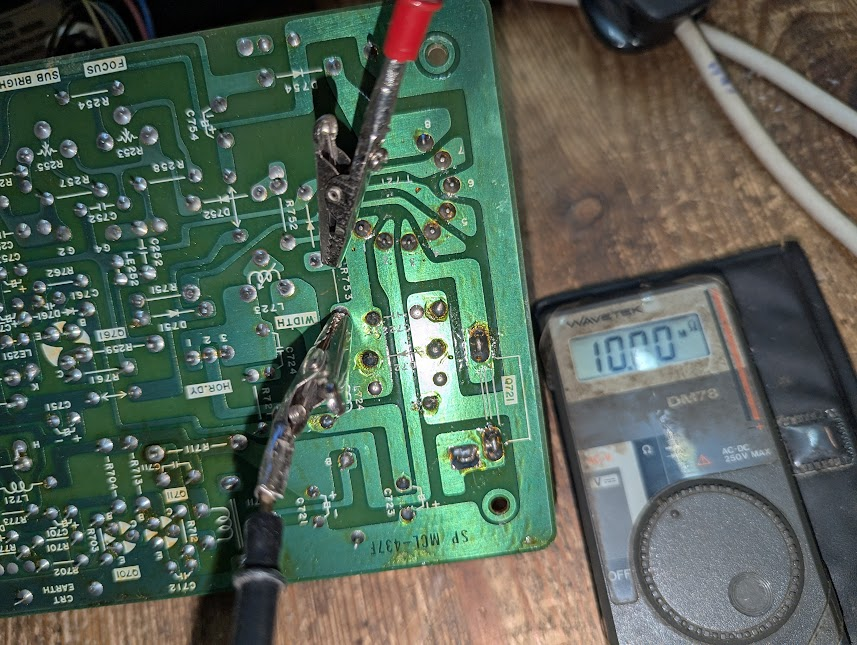
Yep just as I thought very high resistance or open circuit on R753
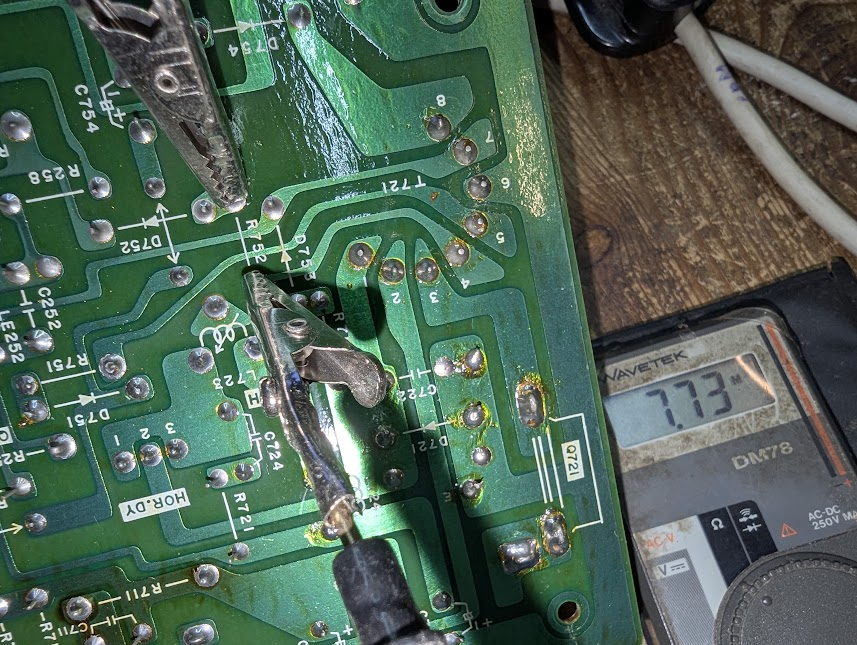
Again very high resistance on R752.

Just to make sure tested out of circuit.
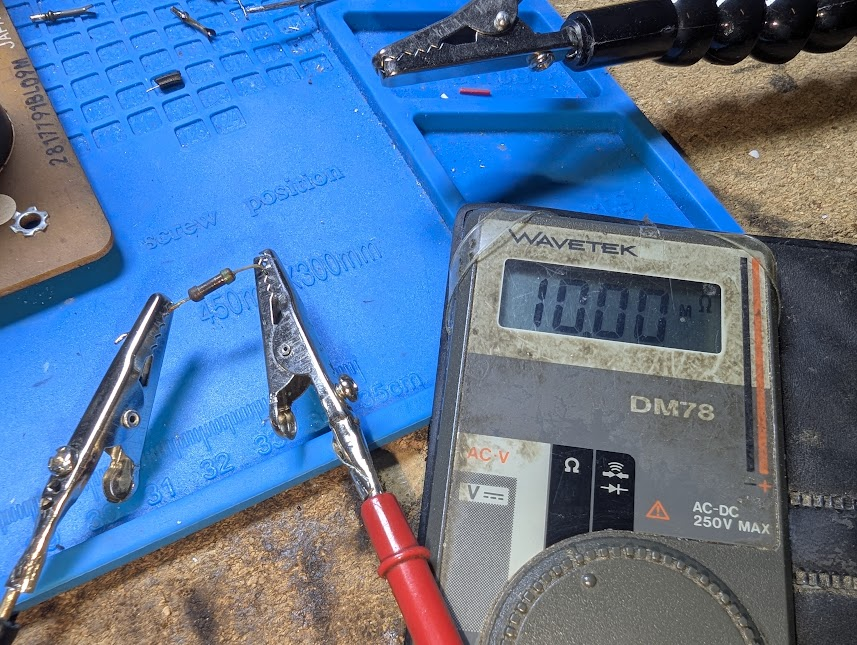
Both resistors are FUBAR. According to the schematics these should be R752 56 ohm and R753 58 ohm both 1/4 watt.
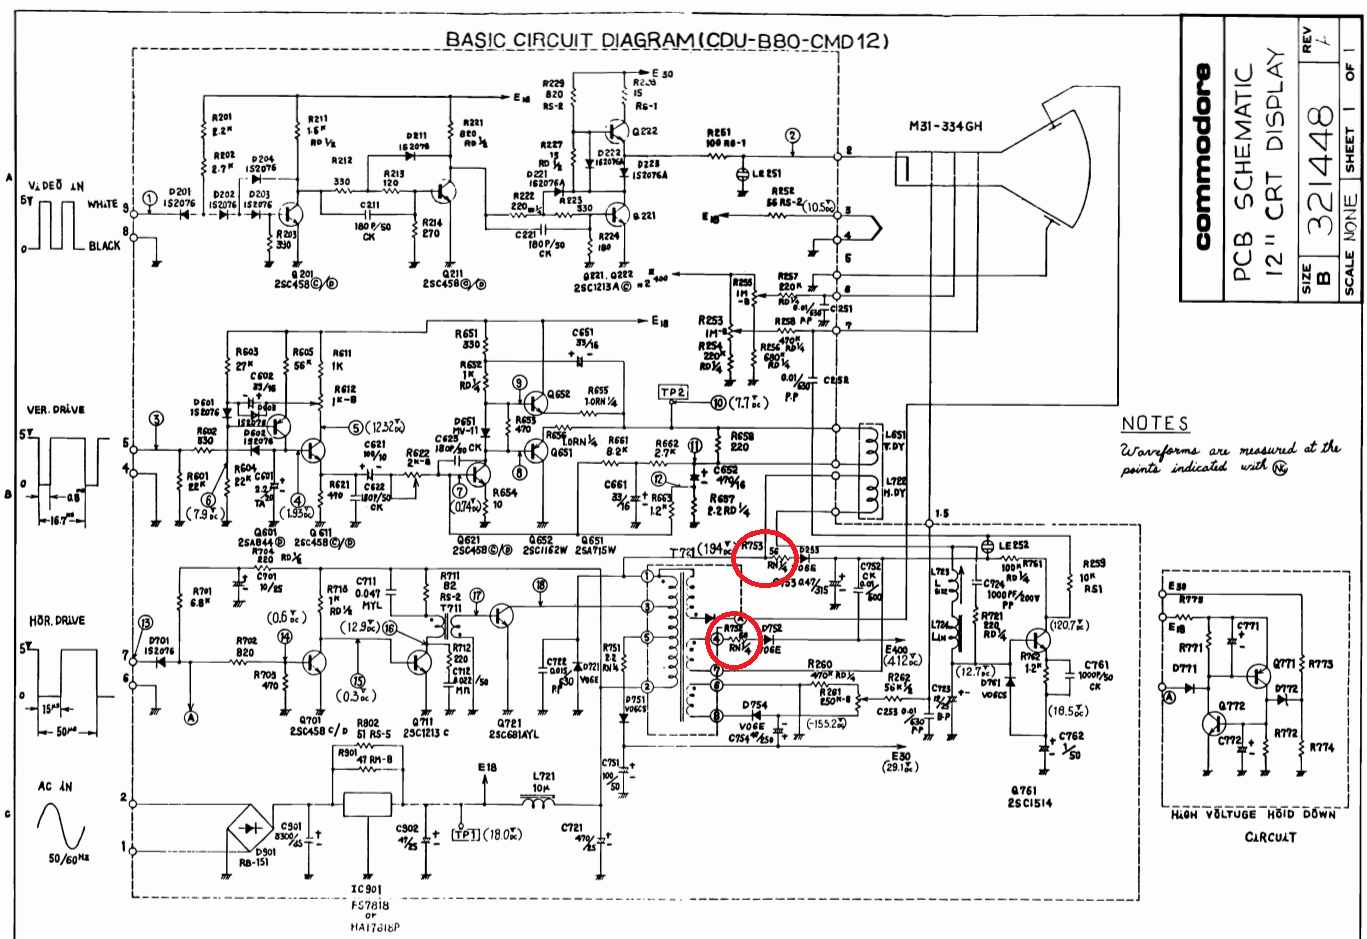
New resistors installed. I didn’t have a 58ohm for R753 so used a 60ohm for now while I wait for the correct resistor to arrive but should be good enough short term.
Reassembled
Progress. Screen working. Makes troubleshooting that much easier.
Bring In The Romulator
Ram Issues
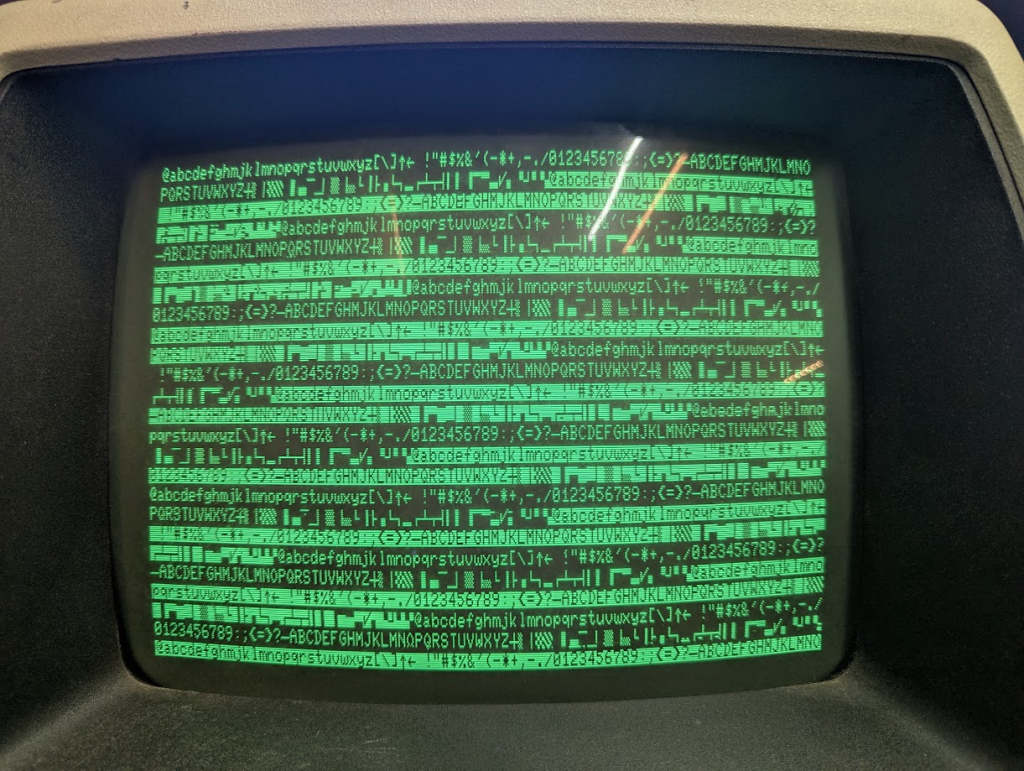
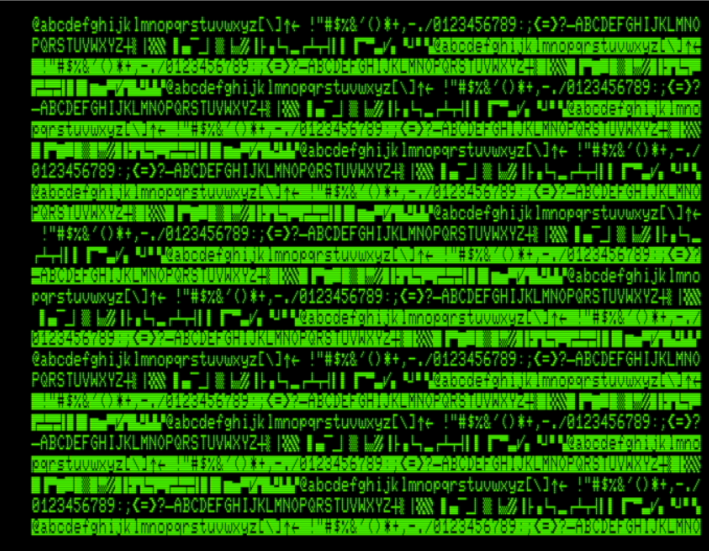
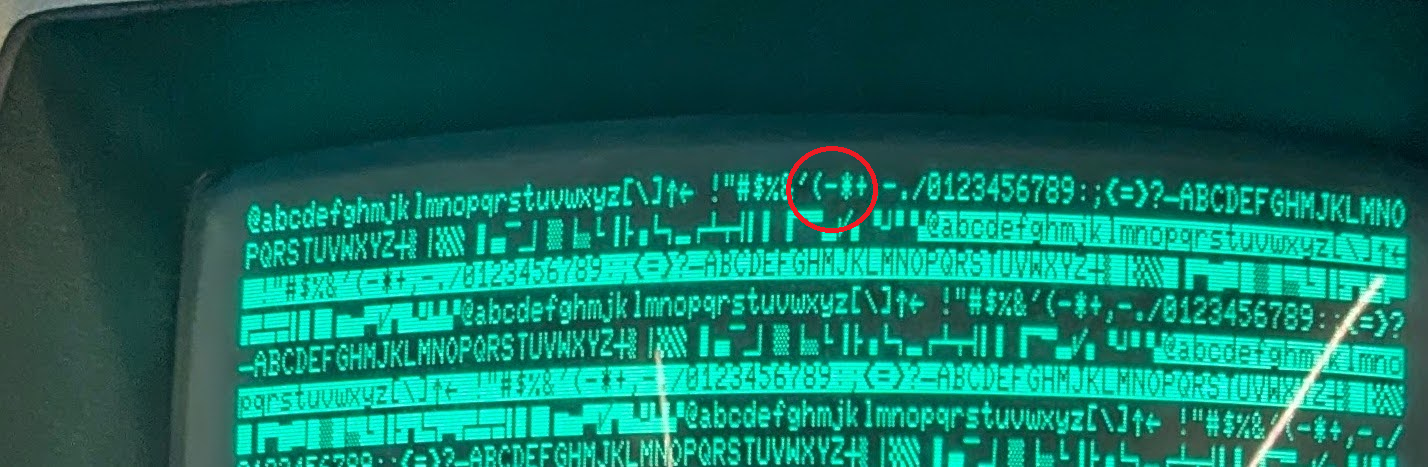
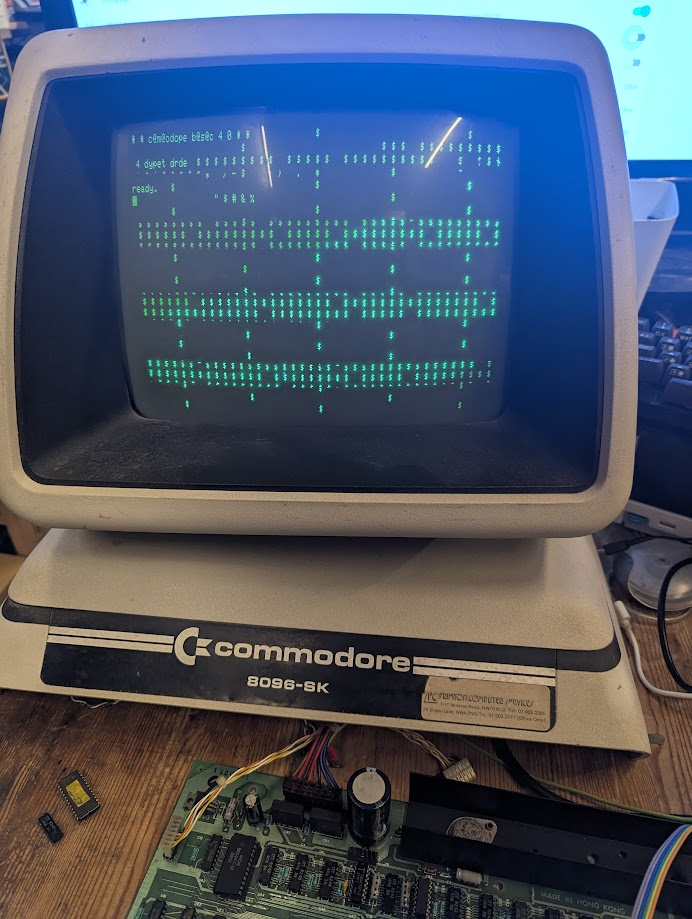
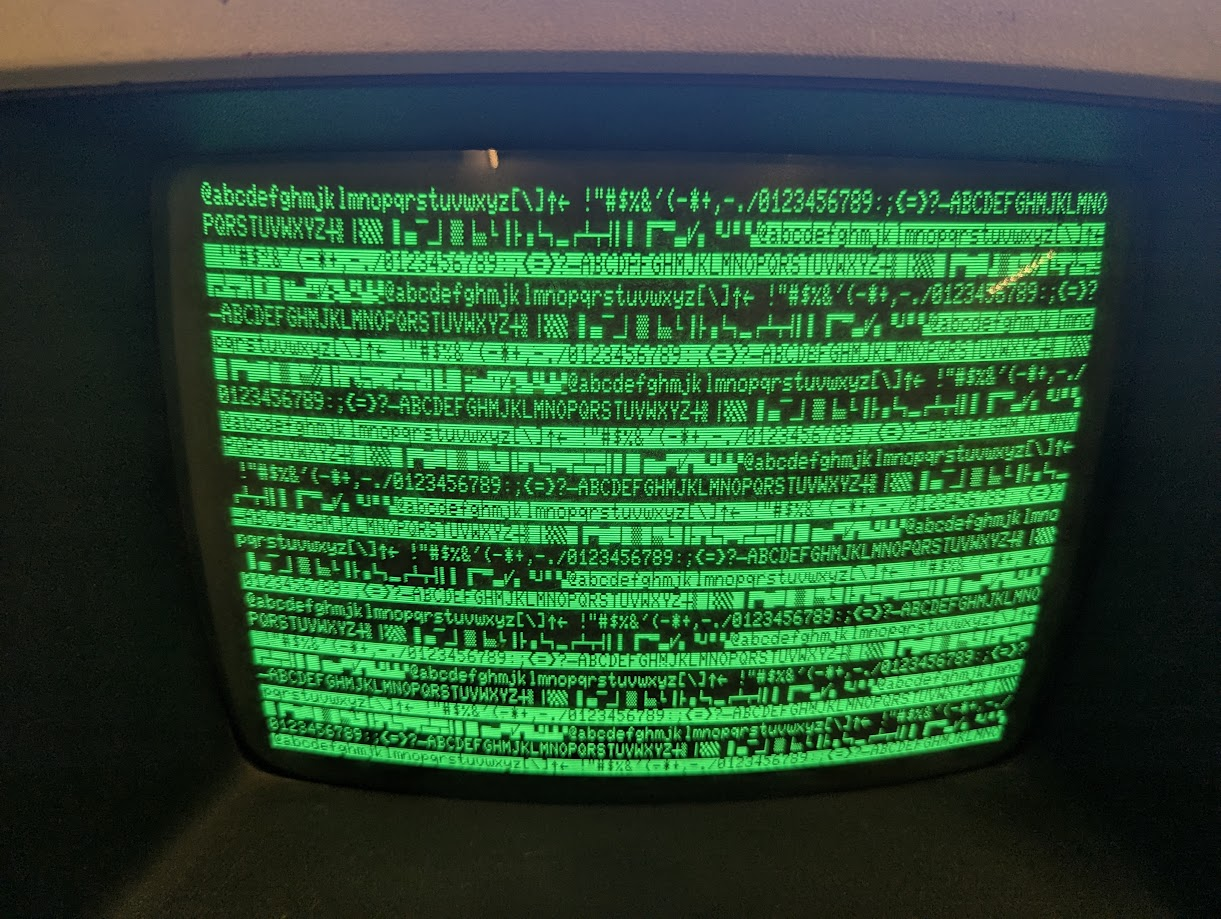
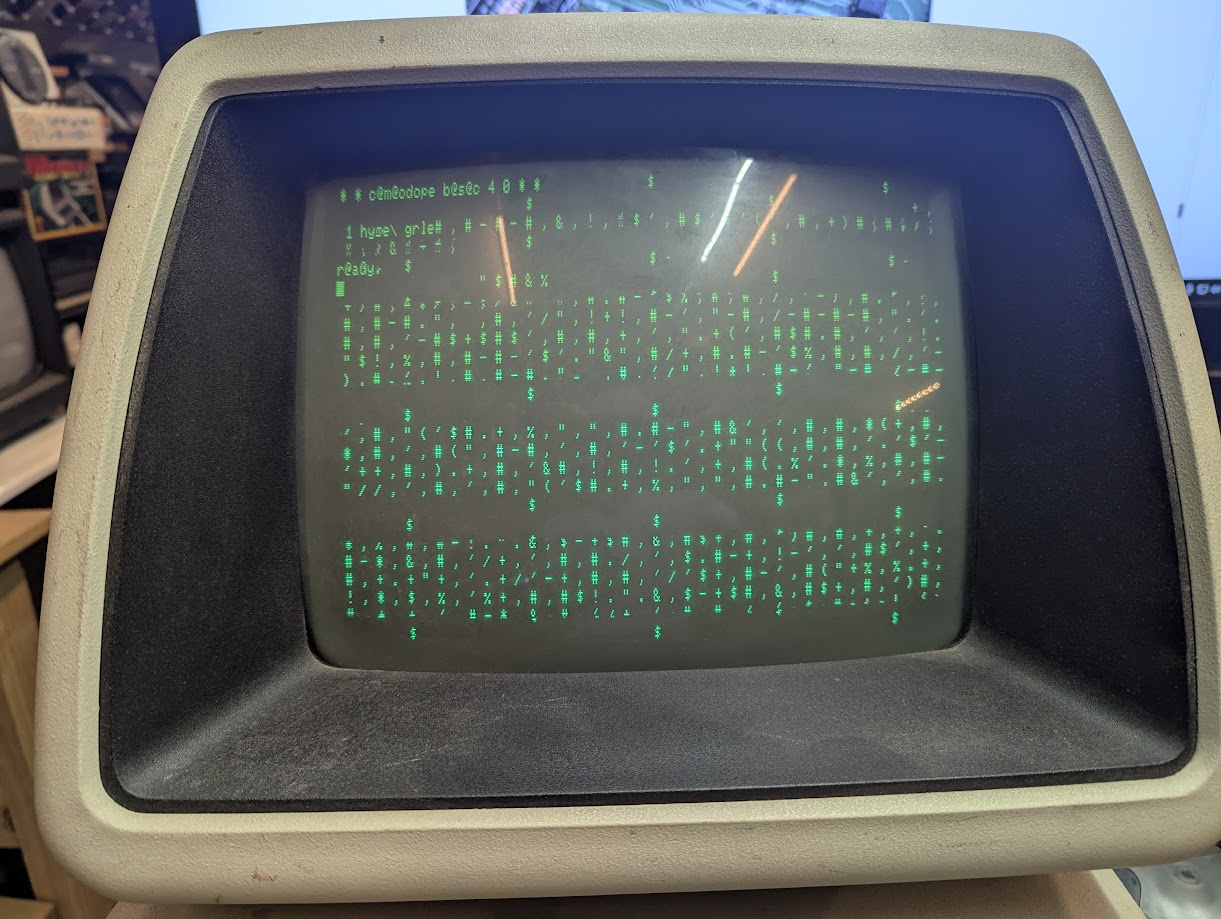
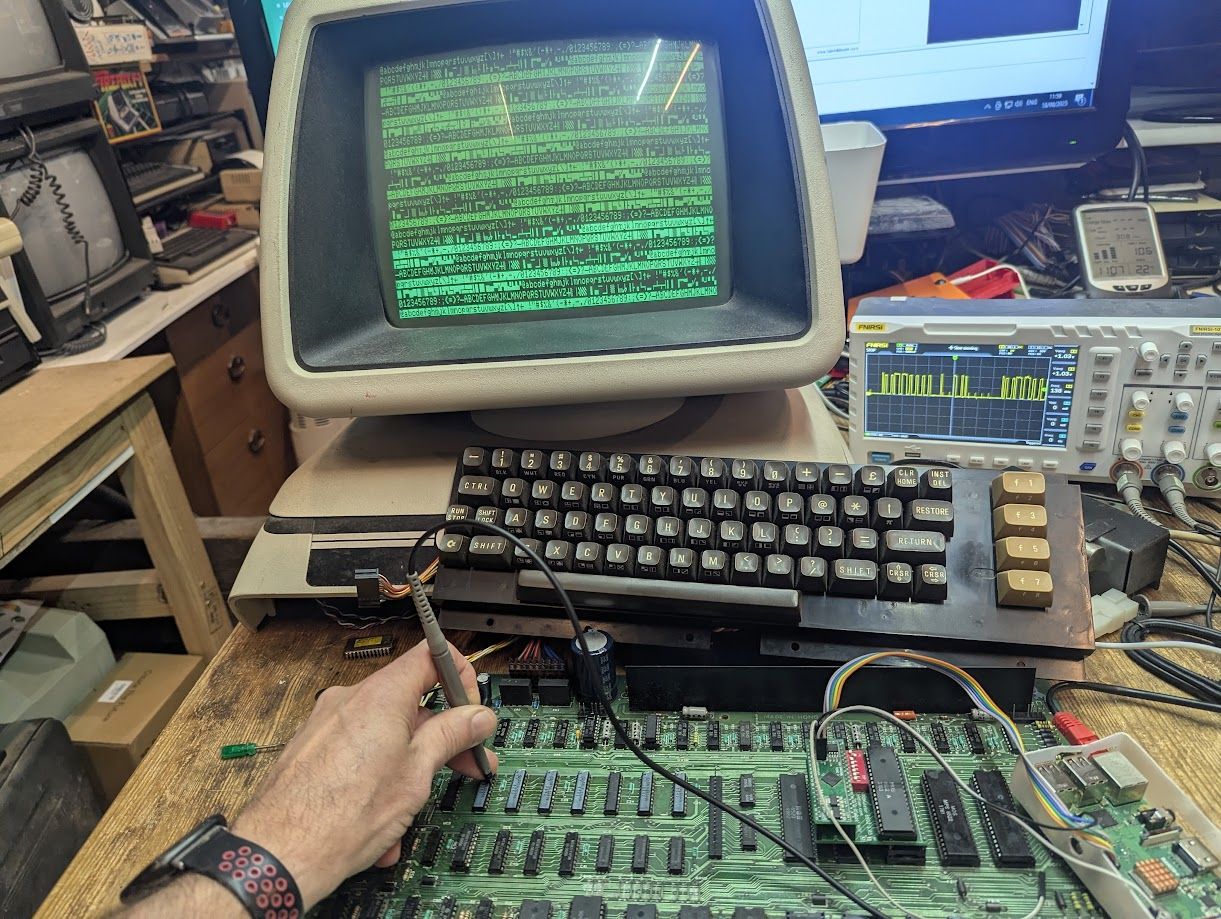
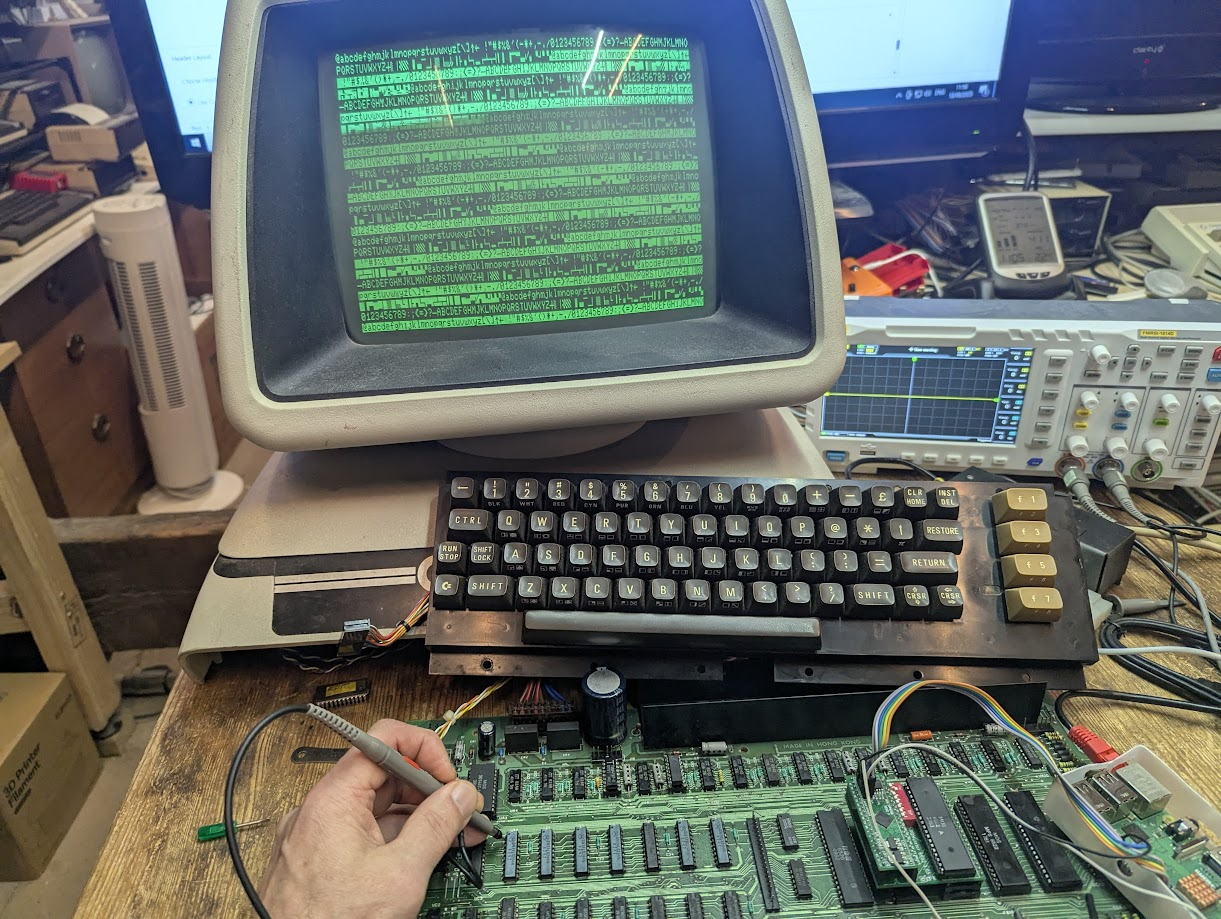
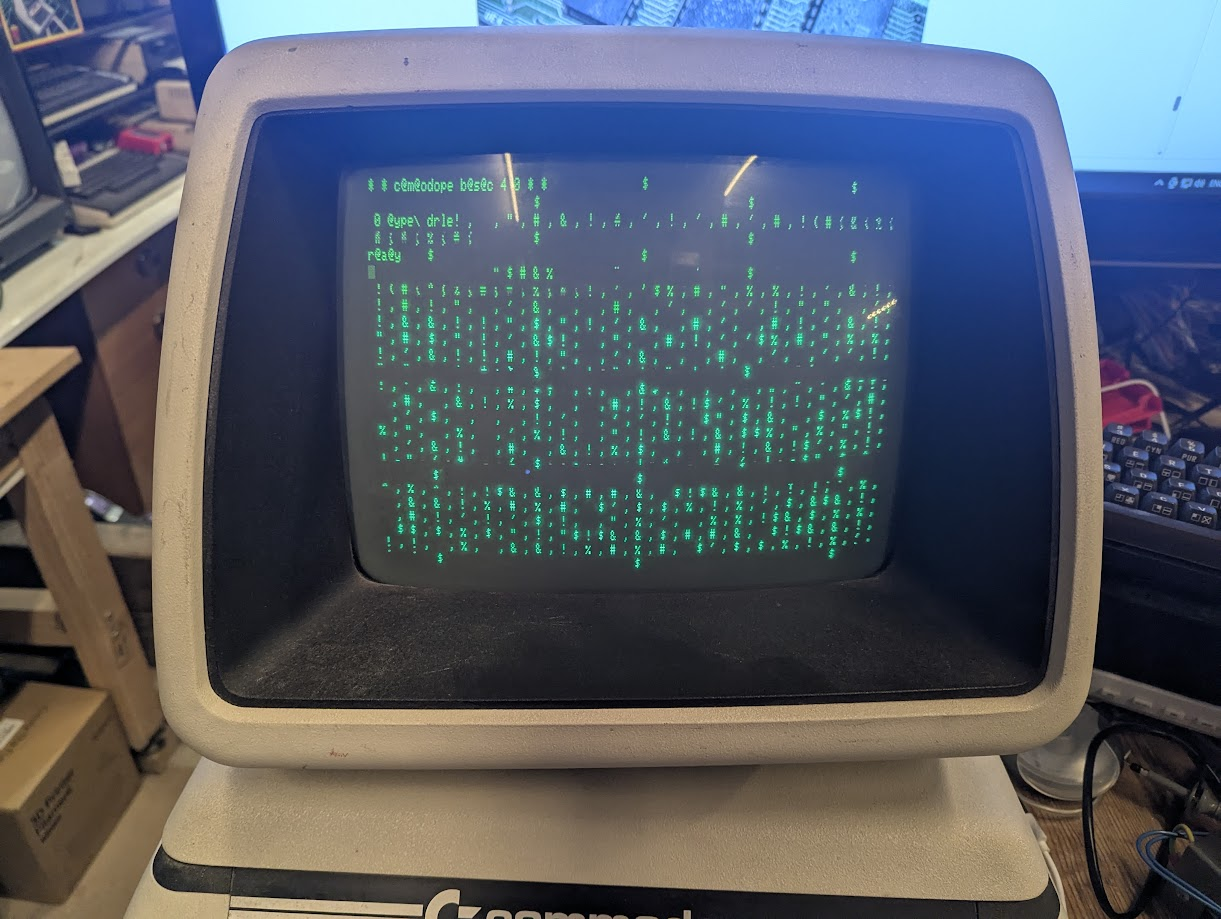
Configuring the romulator with the PETTEST2KV04 Rom gives the following screen which although looks normal on a still photo there is a bit of flickering of some of the graphics characters but most notably the the ‘)’ should appear next to the ‘(‘ character and is a ‘-‘ character (See top middle in below left image). The Pettest rom manual says we should be getting the right image
So I thought I would check the address lines by using a nop generator. I.e Set the full memory to EA and the processor just cycles through all of memory so generating square waves on the address lines.
The pins are a little oxidised so was struggling to get a good connection through the scope probe.
All the address lines and data lines looked fine on all the ram.
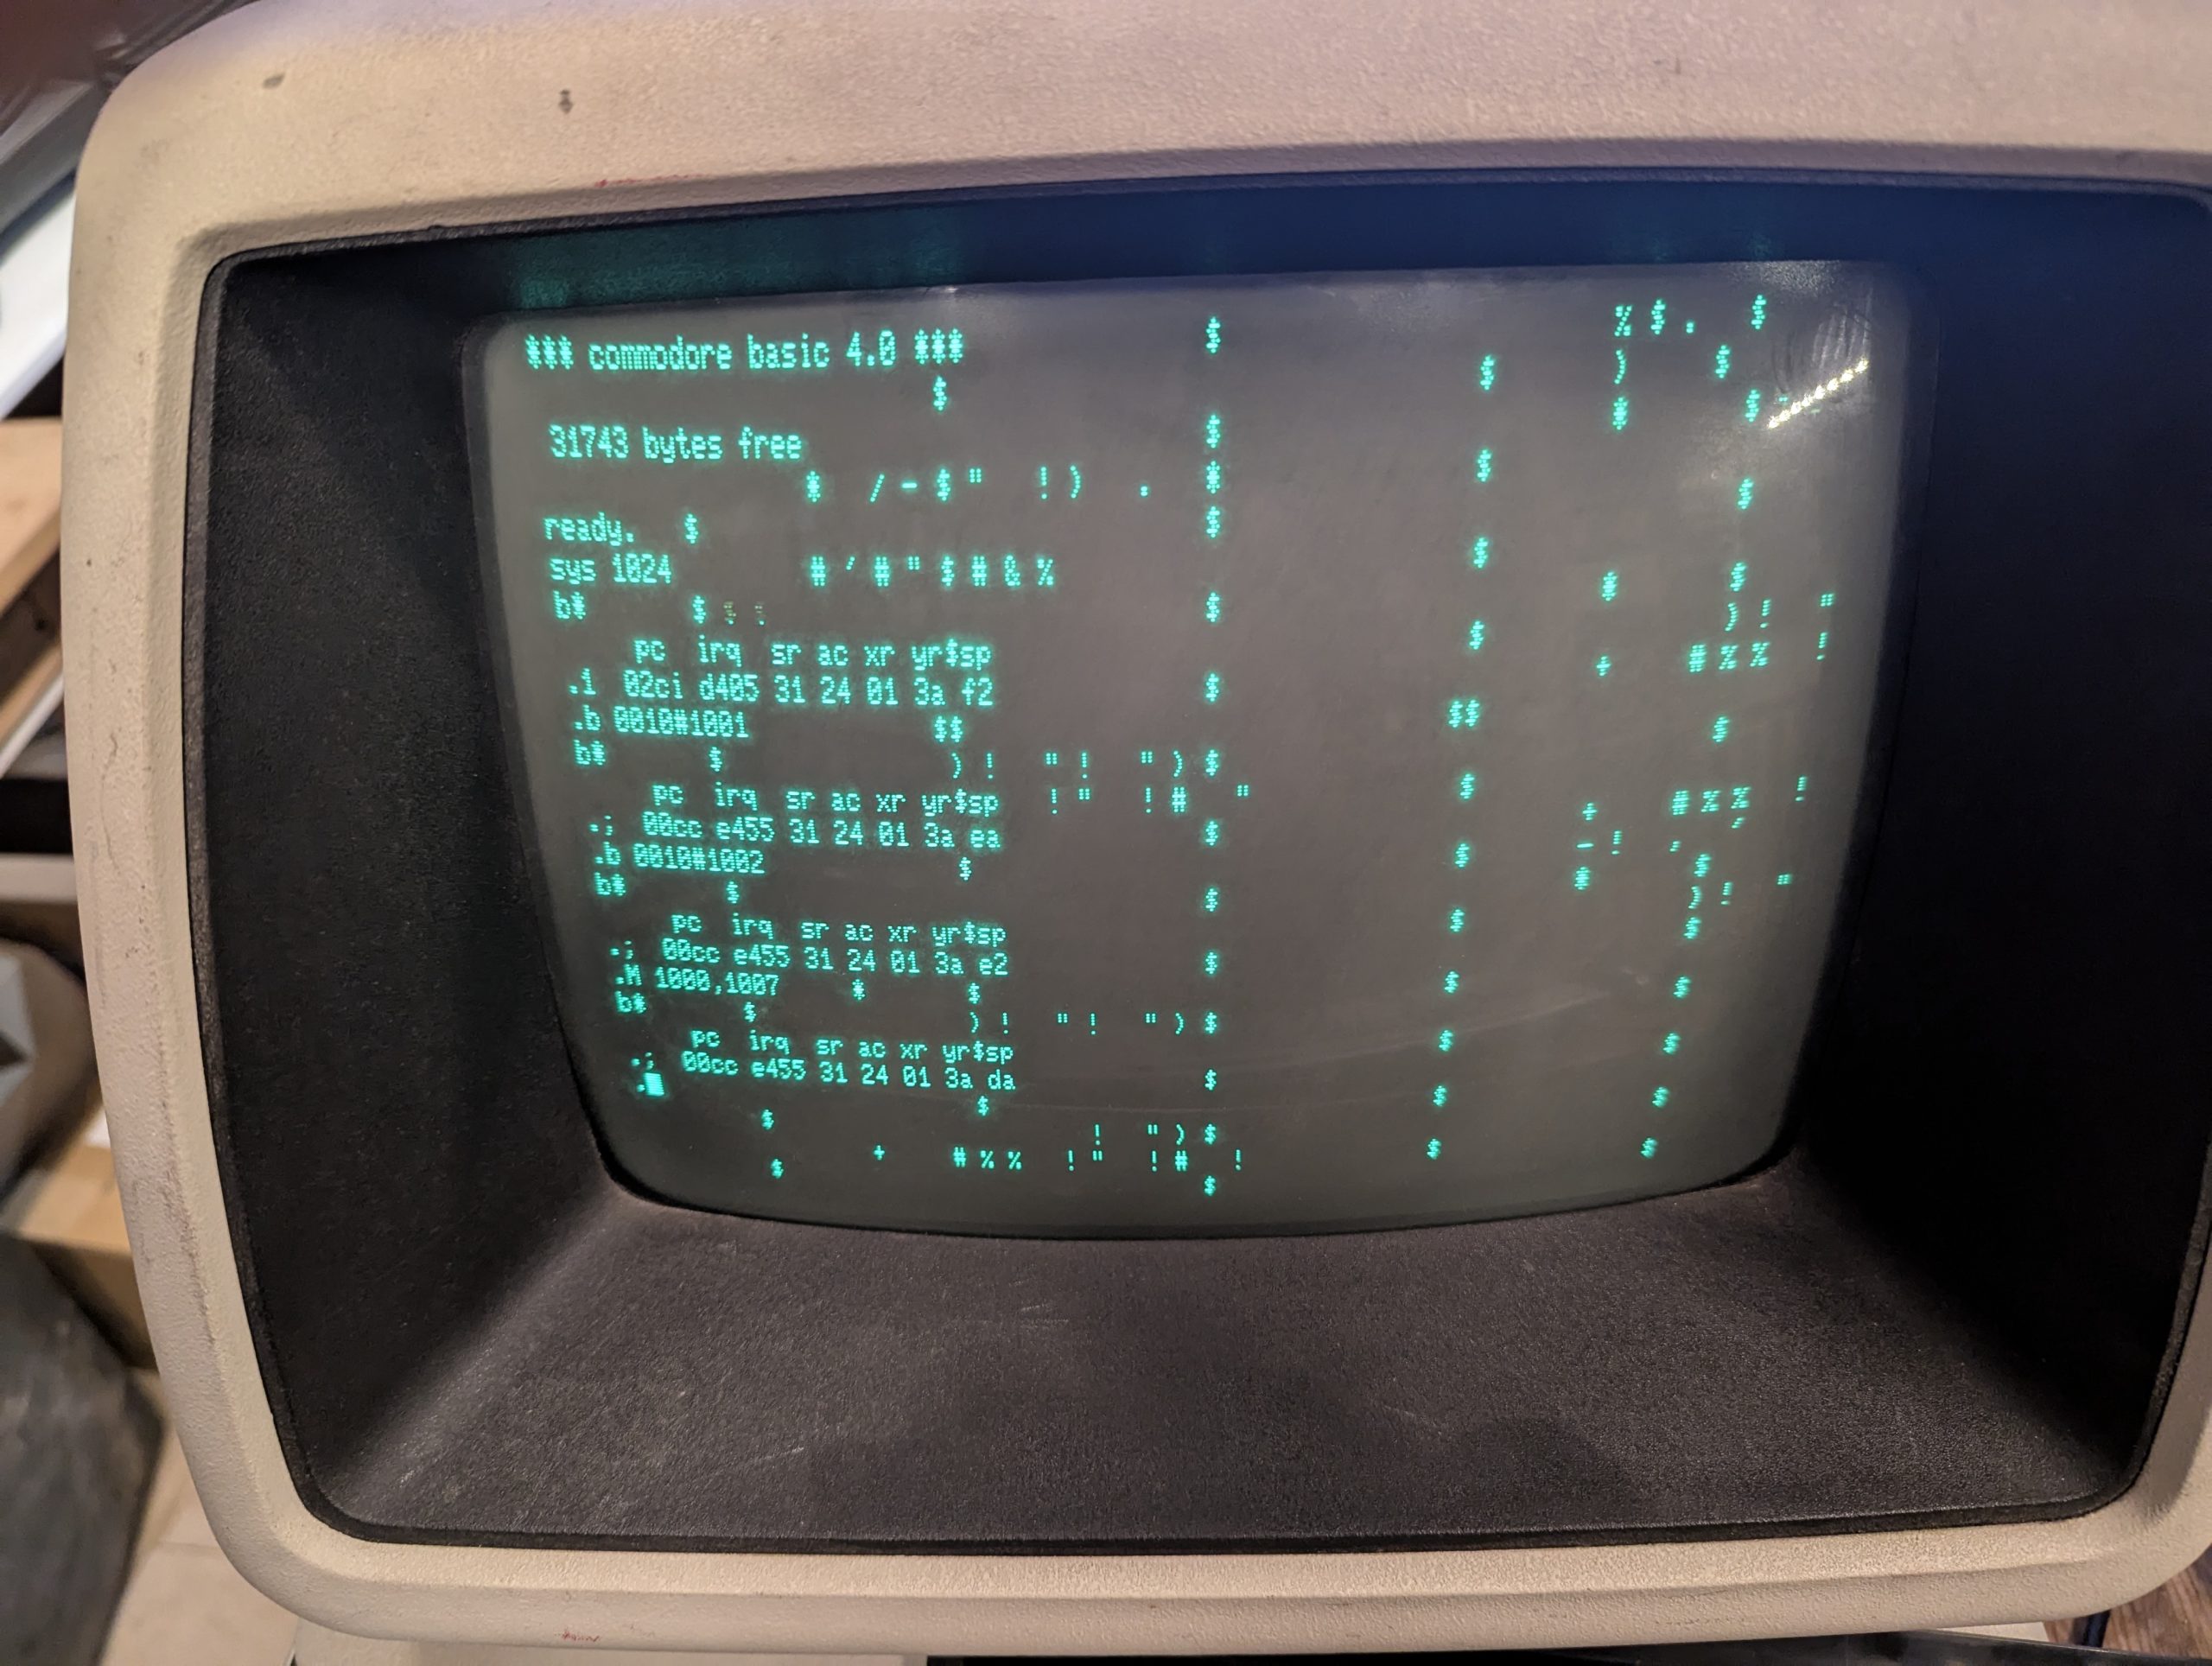
I tried to enter a command in basic but just keep getting a corrupted “Syntax Error” message
Sys 1024 accesses the monitor but still I couldn’t enter any commands
I went back to the PetTest screens with the ‘-‘ character instead of ‘)’ and using this PETSCII set of codes
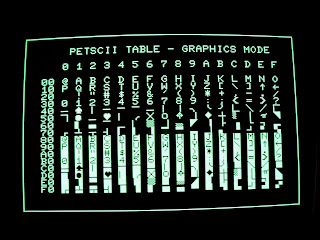
Character ‘)’ is Hex 29 Binary 00101001
Character ‘-‘ is Hex 2D Binary 00101101
Bit 5 ^
So bit 5 is getting stuck high for this character. Strange as the data and address lines seemed to be pulsing fine with the NOP generator. Anyhow Bit 5 corresponds to chip UA9 and looking again at the IR camera image after the Pet has been on for a few minutes reveals that UA9 and UA7 are hotter than the other ram chips.
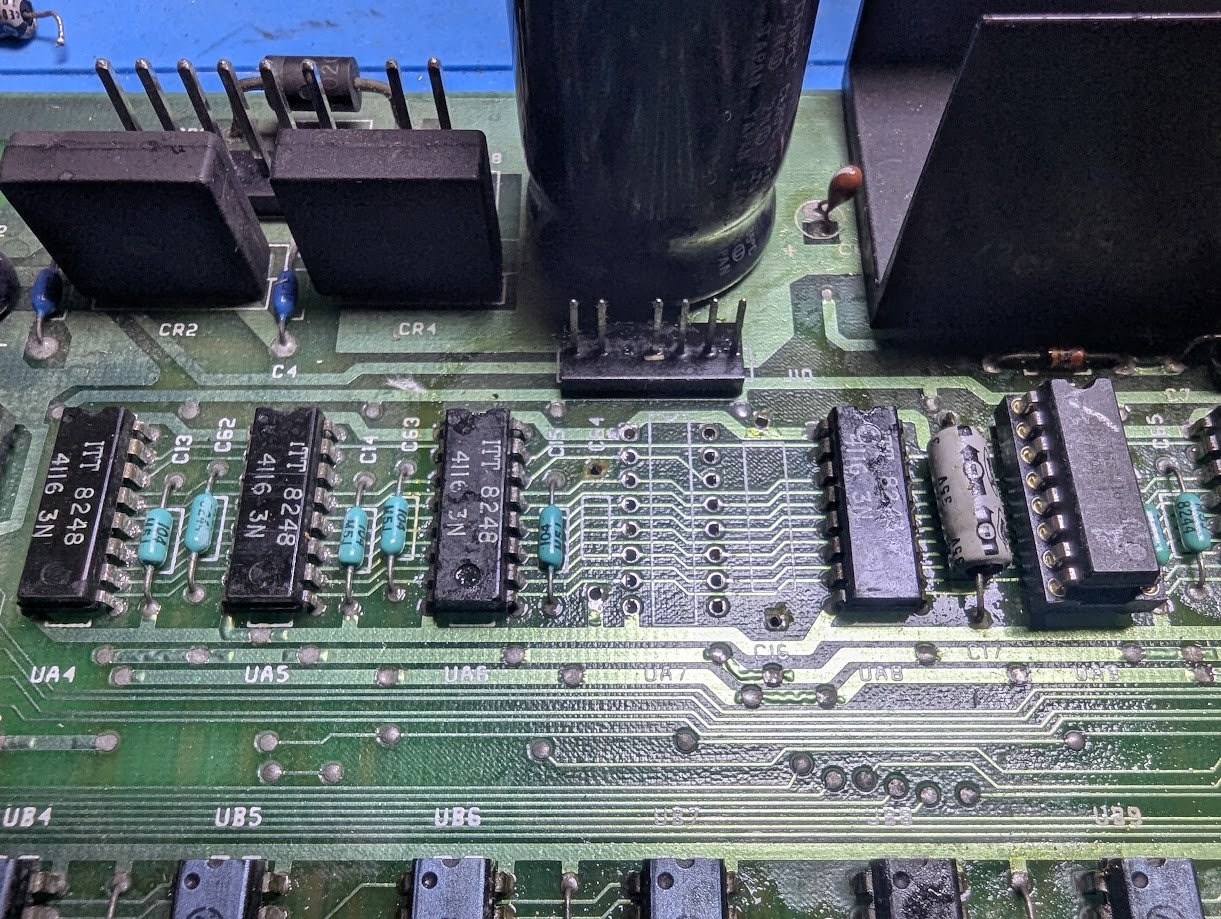
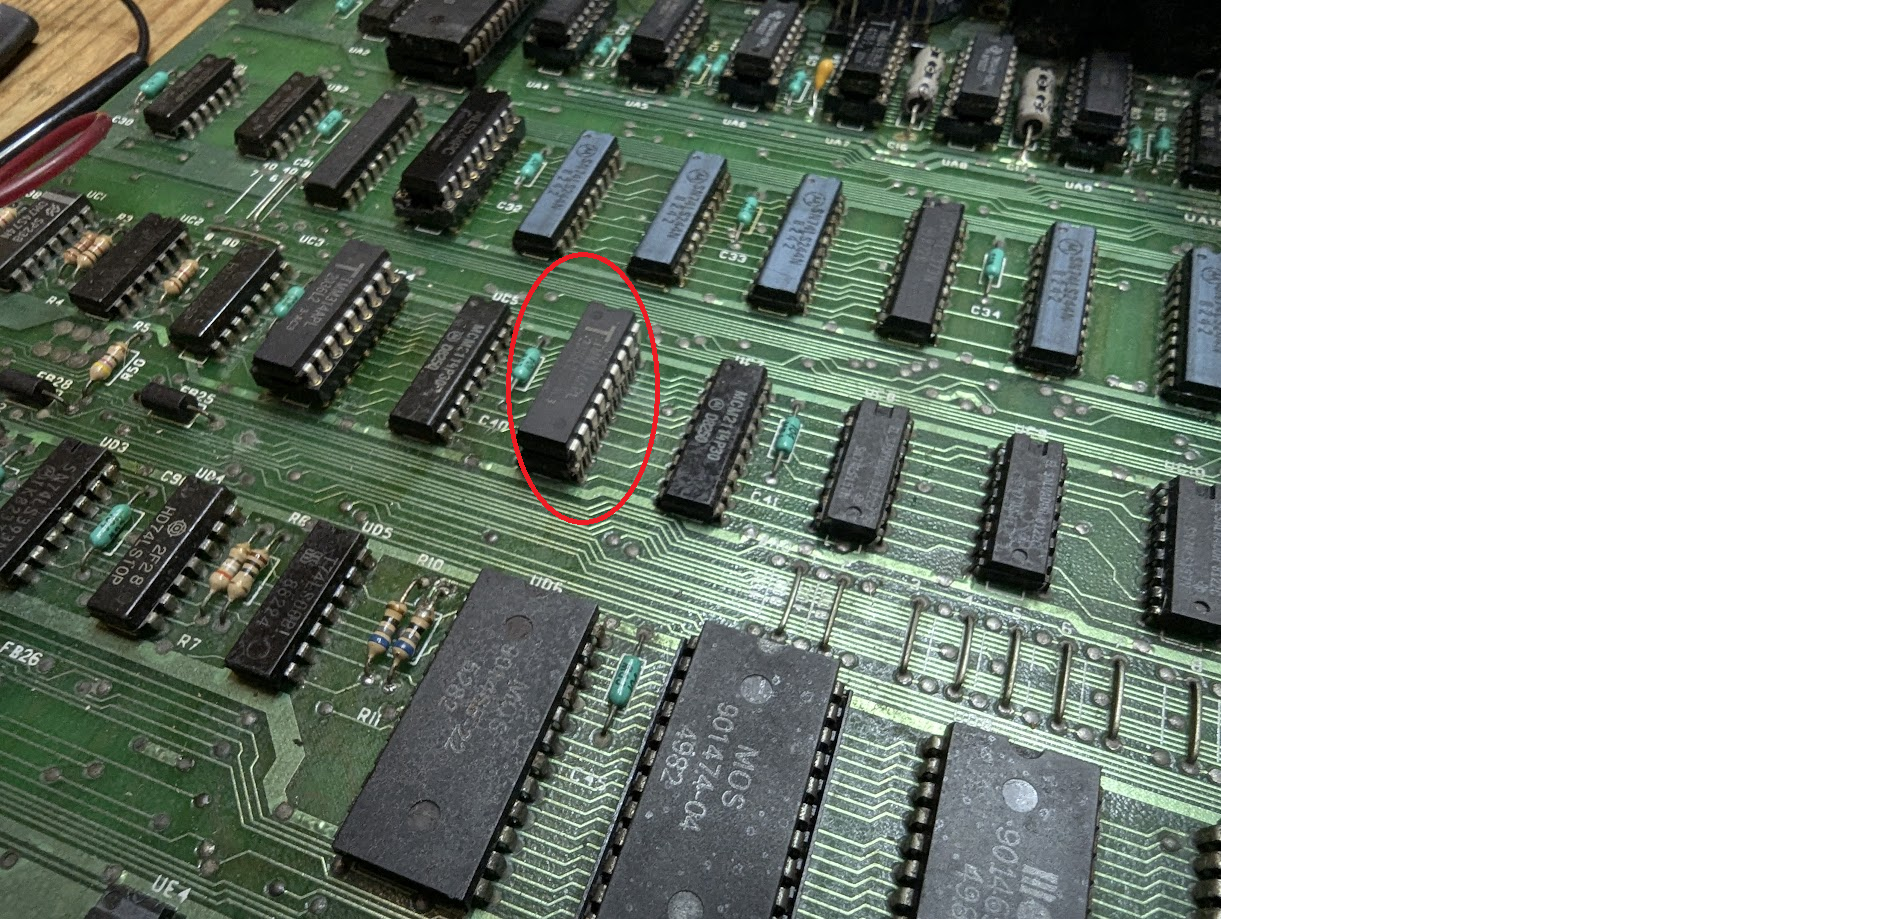
I’m going to take the plunge and socket UA9.
Took some removing as the desoldering station wasn’t enough. I had to use extra solder braid to remove solder from the top side of the pins.
Even though this looked ok it wasn’t.
I should have toned out the holes before installing the socket as there was no longer a connection with pin 10 to the next ram chip UA11 pin10. Lesson learned!. Luckily I didn’t have to remove the socket as I used a round hole socket which is raised above the board a couple of milimeters. This allowed me to get a fine soldering tip in the bridge the pin to the trace with a blob of solder. That was lucky!
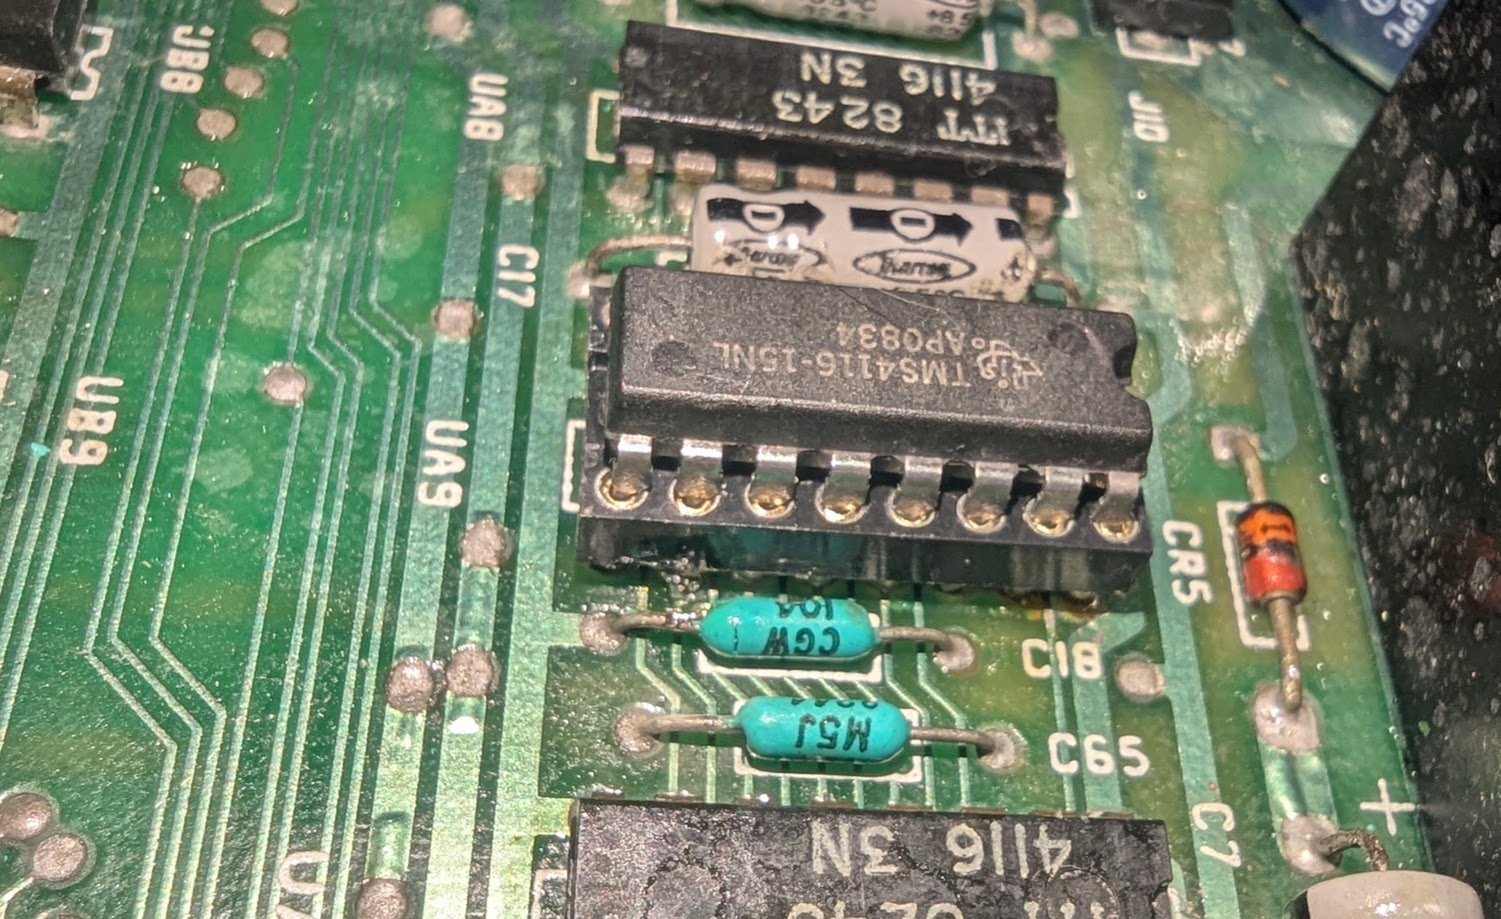
All the pins tone out correctly now.
So was the ram chip faulty. I haven’t got a ram tester but I have got a previously repaired Sinclair Spectrum 48k which also uses 4116 ram and have created a diagnostic rom for it.
The answer is yes the ram chip was faulty as shown in the left image which gave a corrupted screen and an error beep. The ram chip was installed bottom left. The right image is all ram checking out ok with a good ram chip.
So what does the PET do with the new ram chip. Sadly no better. With the PETTest rom the ‘M’ character did flicker slightly with the faulty ram and is now stable but the ‘)’ character is still incorrectly displaying the ‘-‘ character. The normal boot screen with edit rom is still corrupted.
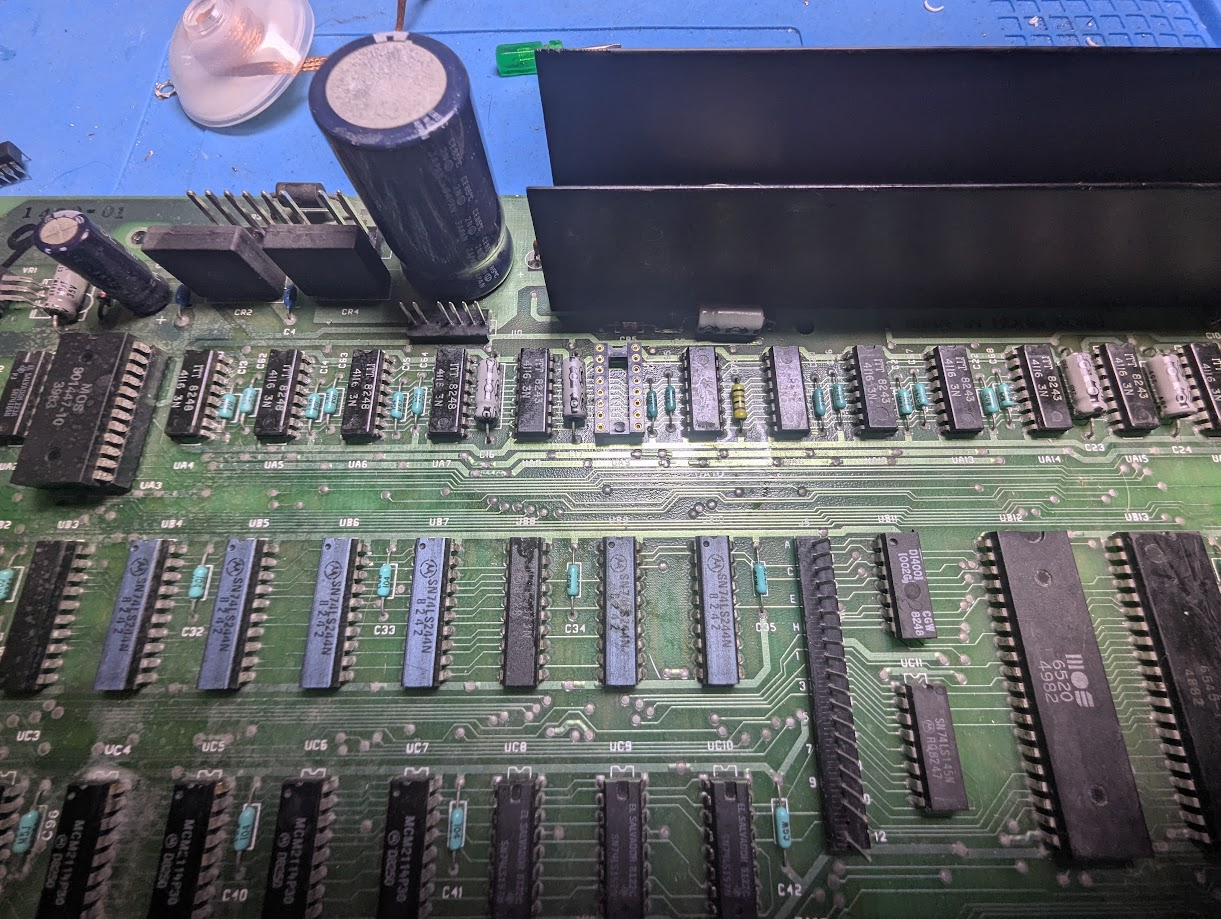
I’m going to socket UA7 as that was also getting slightly hot.
Thats UA7 removed and I removed the adjoining caps to give more room. This time i’m going to test pin hole continuity before installing the socket 😉
The second chip came out easier as I just used solder braid. The desoldering station does not work well with the short legs on these ram chips.
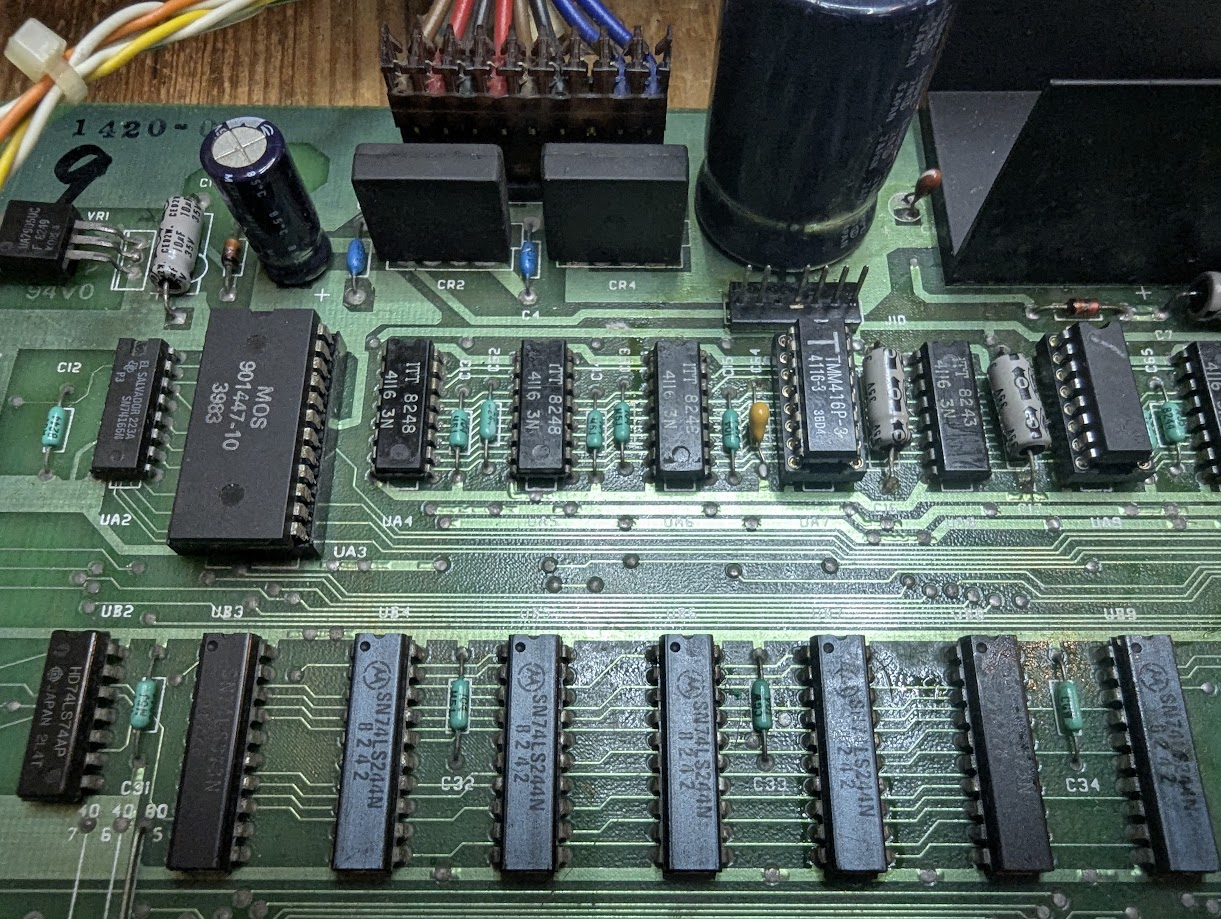
Here’s another lesson learned. On replacing the previous ram chip UA9 I tested continuity of the pins to the next ram chip UA11 in the schematic which all tested fine but didn’t check continuity to the previous ram chip UA7 and now I’ve found a broken connection between pin 5 of UA9 to pin 5 UA7. And its not due to the removal of UA7 as the break is again under the socket of UA9. Aaargh!!!!. This board is very fragile. Note the new capacitor as the original just fell apart on removal.
A new ram chip in and…
Still them same. The ram chip did however test faulty with the Spectrum diagnostic test.
I need a new approach.
I found a tip on Tynemouth to swap the connections of resistors R10, R11 which effectively switches the ram banks so the lower becomes the upper bank and vice versa. This should highlight if we have a ram issue in both banks. The lower bank is UA5,UA7 etc. to UA19 and the lower block is UA4,UA6 etc. to UA18.
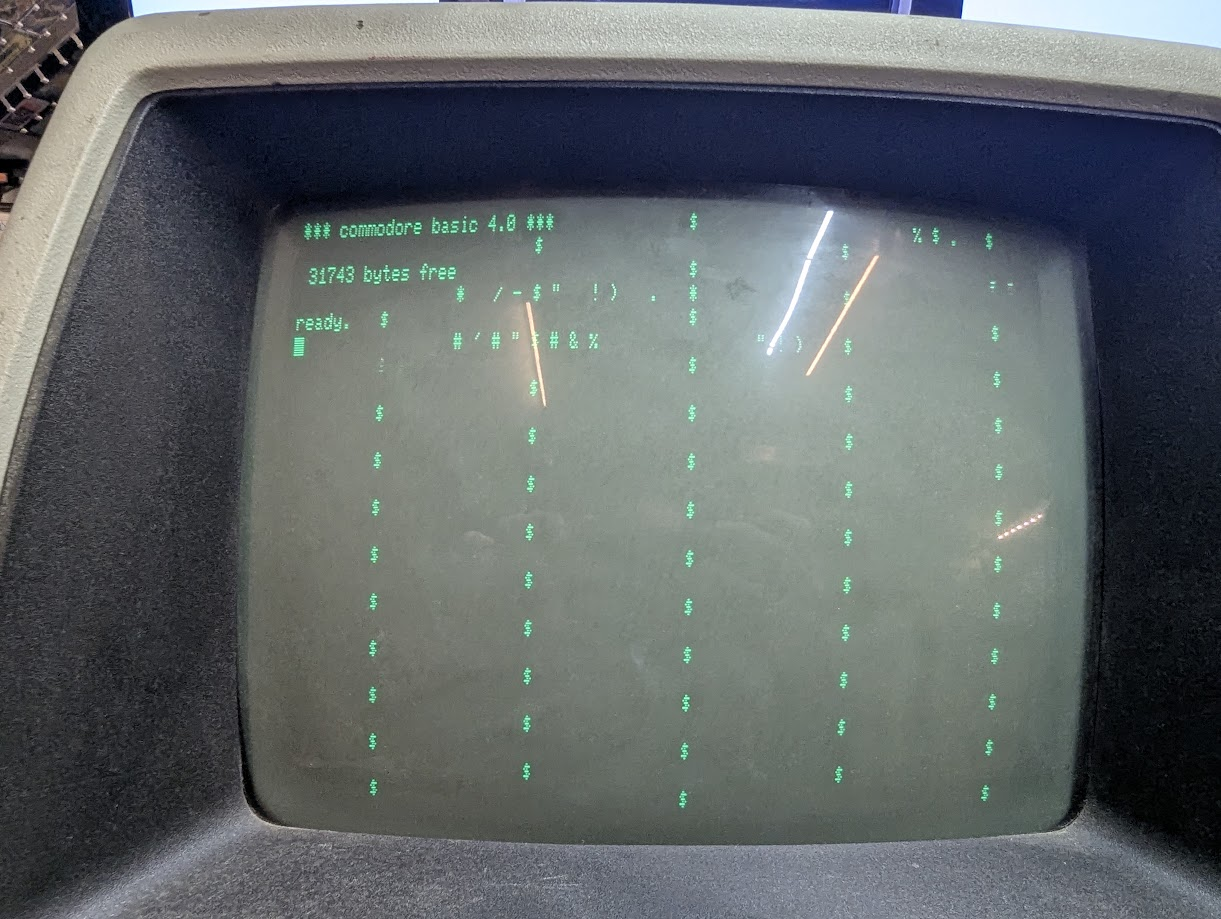
There seem to be many more ‘$’ symbols on screen and after a few reboots it almost full of ‘$’ which remain the same after successive power cycles. The PetTest rom displays pretty much the same.
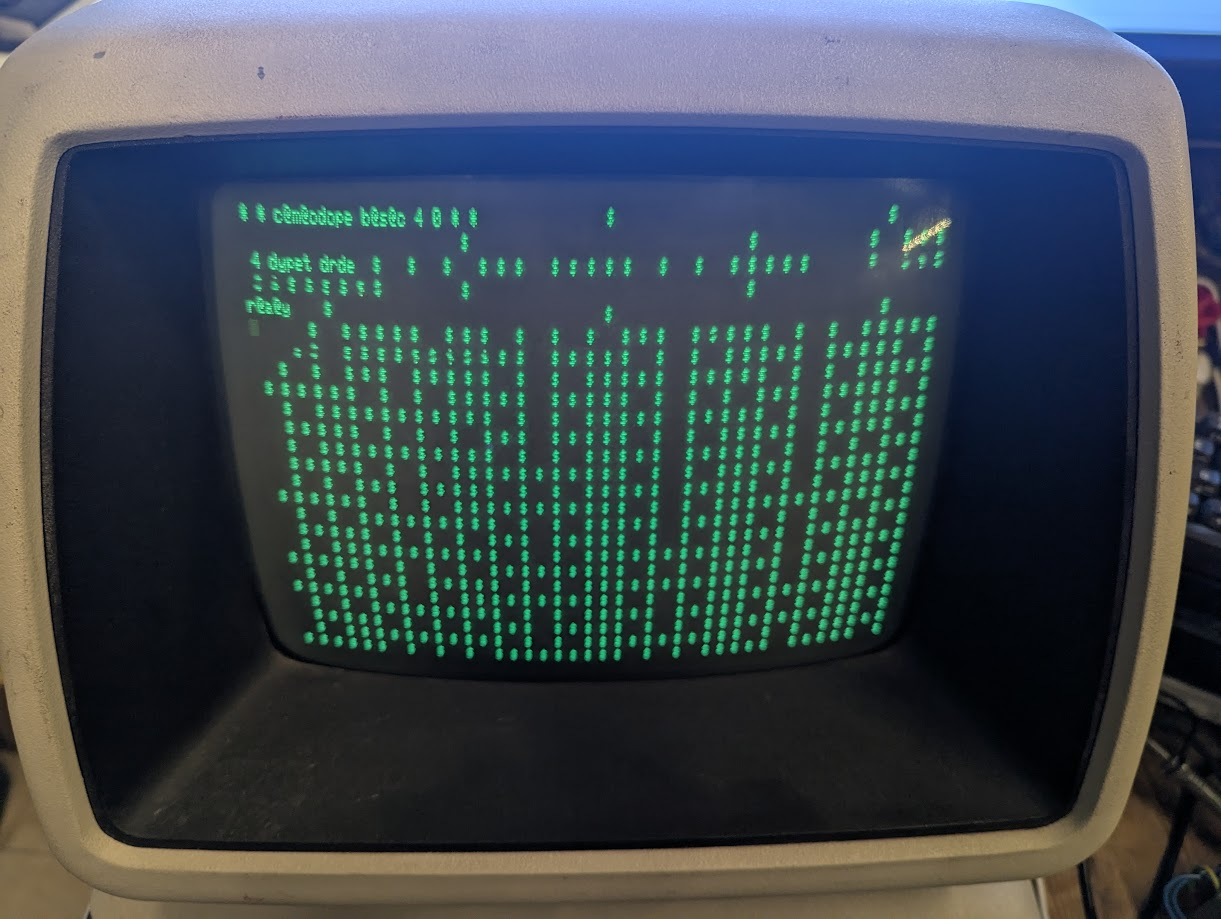
I’m going to return the resistors to the original configuration.
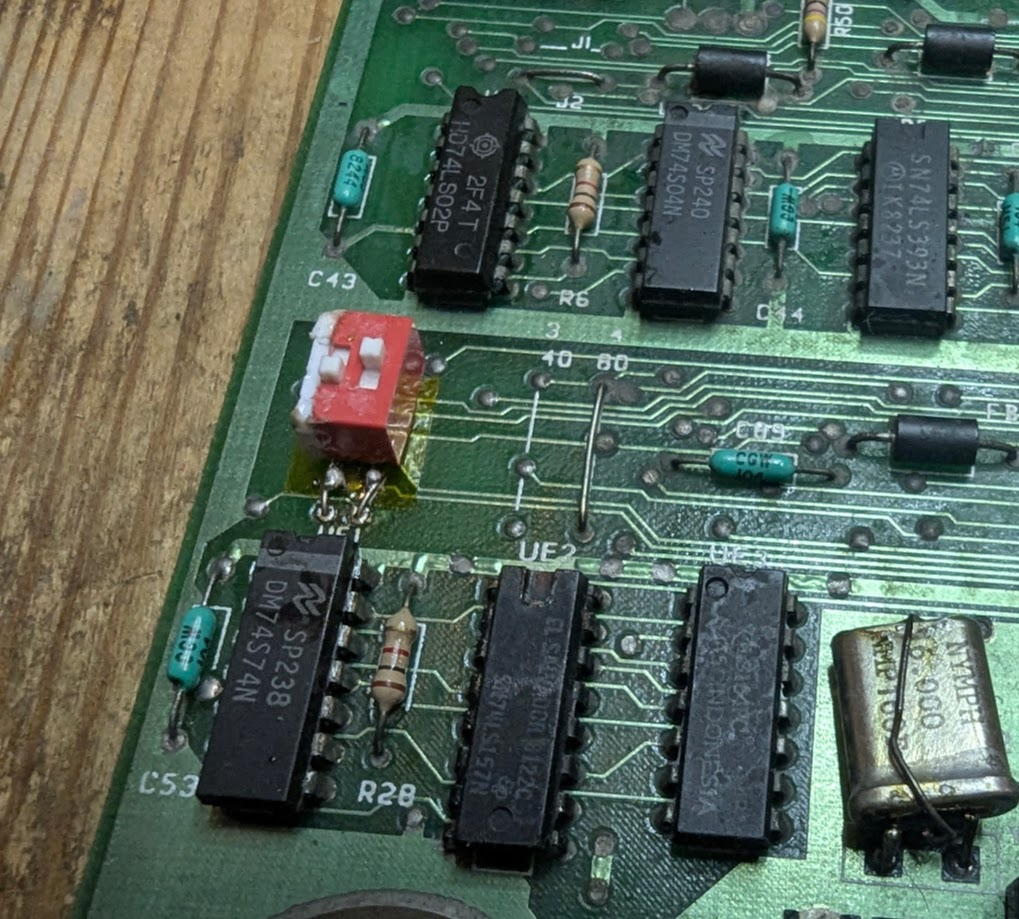
There is also jumper wires at Y and Z which allow switching the machine to just 32K/16K of main board ram. This machine was configured for 32K so jumper Z was linked.
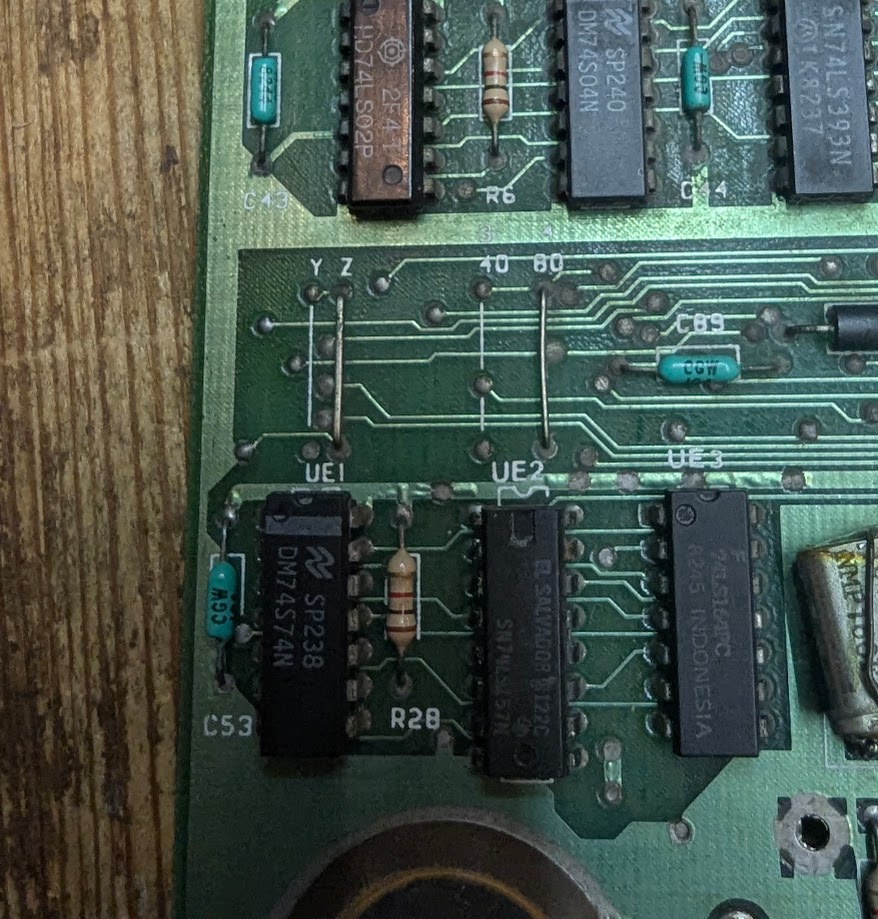
I’ve changed the links to switches so I can test if there is any difference with the machine set to 16K/32k and with the upper and lower bank of ram selected.

No difference whatsoever.
I’ve decided to socket the video ram to see if it hopefully clears the screen up and allows me to enter commands.
First video ram chip is out and it was a pig! to remove. Still using solder braid to best protect the board but its a slow process.
I was researching how to test this 2114 ram chip and the best option for me was to use the Vic20 which has temporarily donated its keyboard to the PET even though it doesn’t work yet.
Unfortunately the 2114 colour ram in this Vic also needs to be socketed. Fortunately this is much easier than removing chips from the PET.
Testing the PET video ram chip tests ok.
I decided to test signals around the video circuitry using the scope and spotted this on pin 15 of UB3 74LS373 with is the Even 8bit latch.
This was happening very intermittently and I was lucky to catch it but I would like to bet it coincides with the corruption on screen. I’m definately in the right area as shorting pins
Additionally testing the next chip UB4 74LS244 pin 3 there was no signal but on pin 17 there was a signal which was strange.
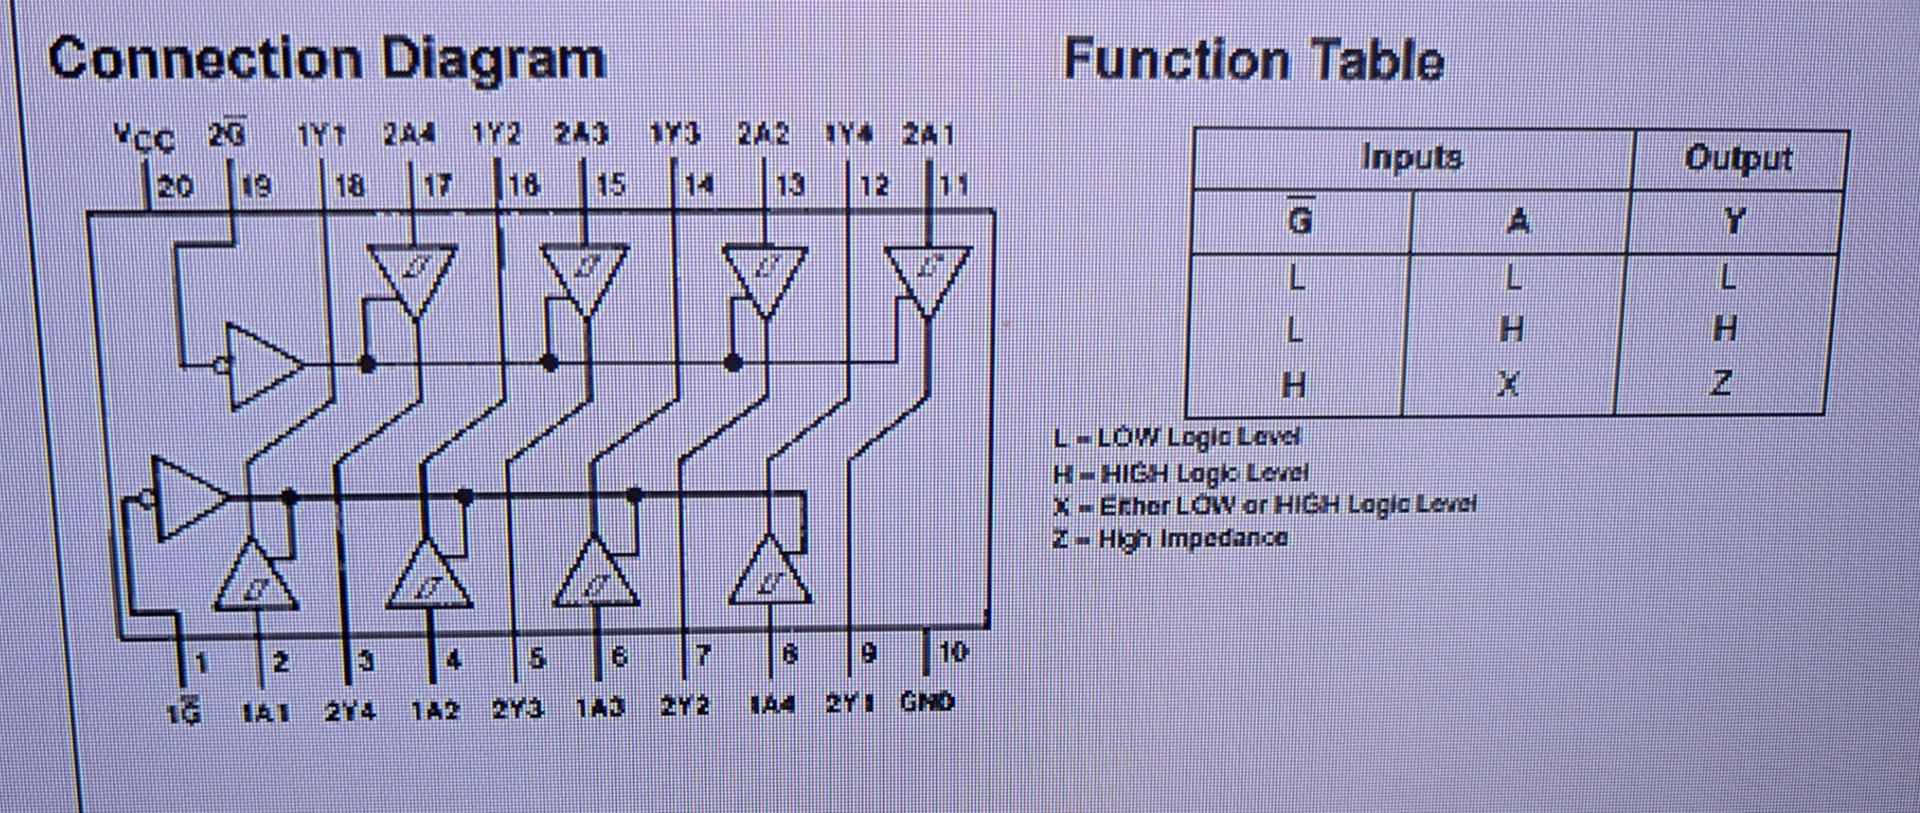
From the logic diagram above when getting a signal on pin 17 we should definately get something out of pin 3 so I think this is a faulty chip. Time to socket.
Chip removed so best check for any connection issues before putting the socket in this time.
No issues so in with a new socket and chip.
After booting the machine sadly it was exactly the same.
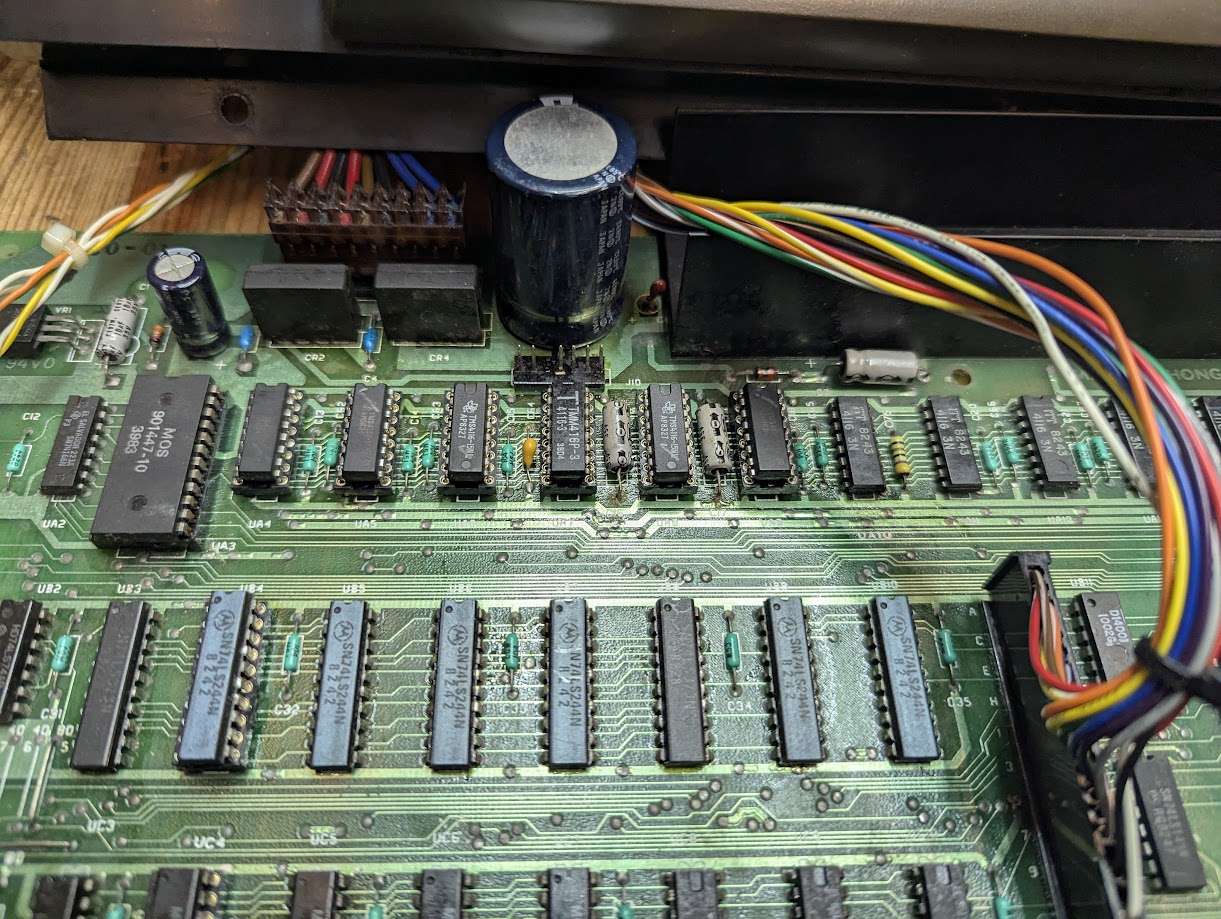
I’m now waiting for a 74LS373 to arrive. In the mean time I’m going to socket the first couple of ram chips as to get the machine to boot using the romulator I have to simulate these ram chips in the romulator.
My impatience got the better of me and rather than waiting for the 74LS373 to arrive I thought I would check the ram as 0 bytes was displayed. So socketed more ram. Half of which, in the lower half, was bad. I tried reusing the good chips but because their legs have been cut so short they won’t fit properly into the sockets.
Its progress as I now have the correct bytes free.
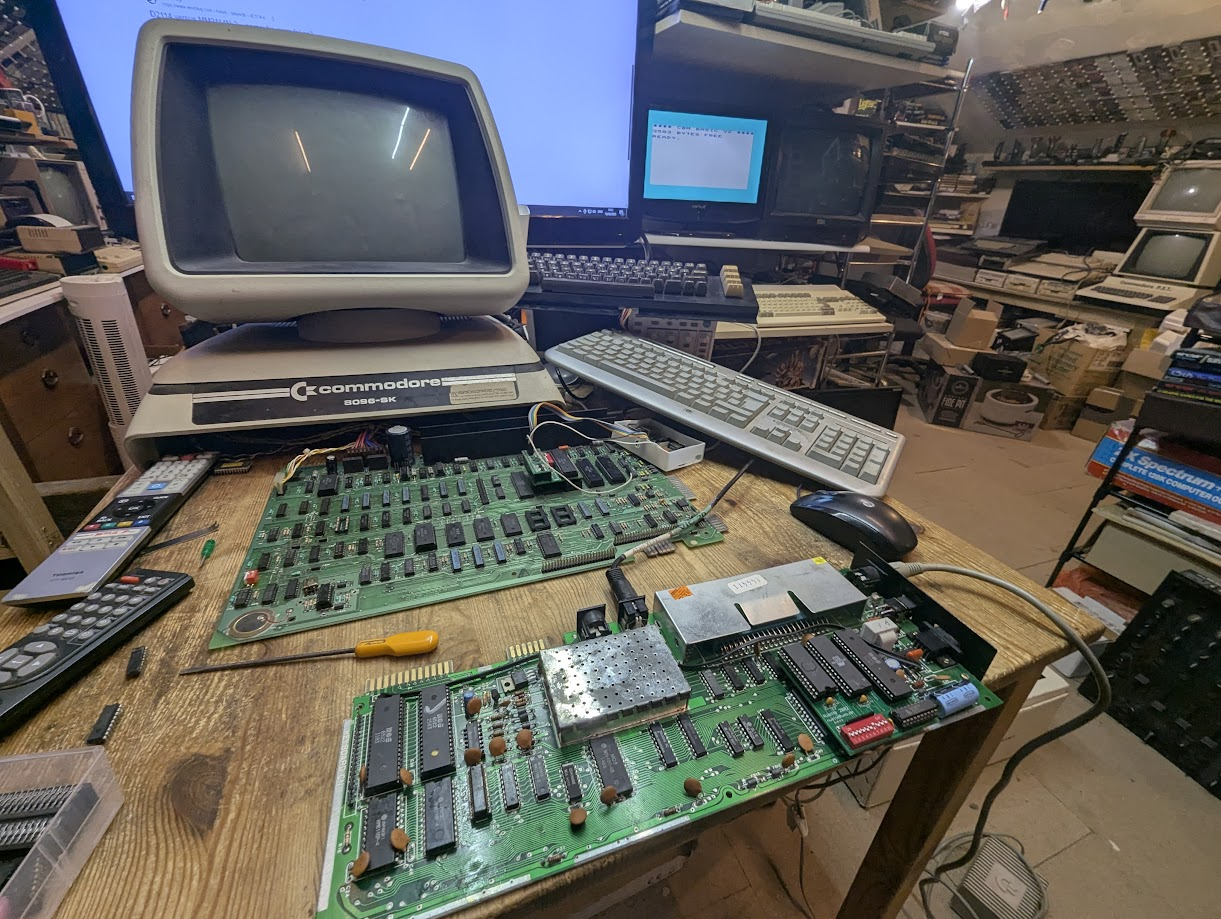
Vic 20 Keyboard
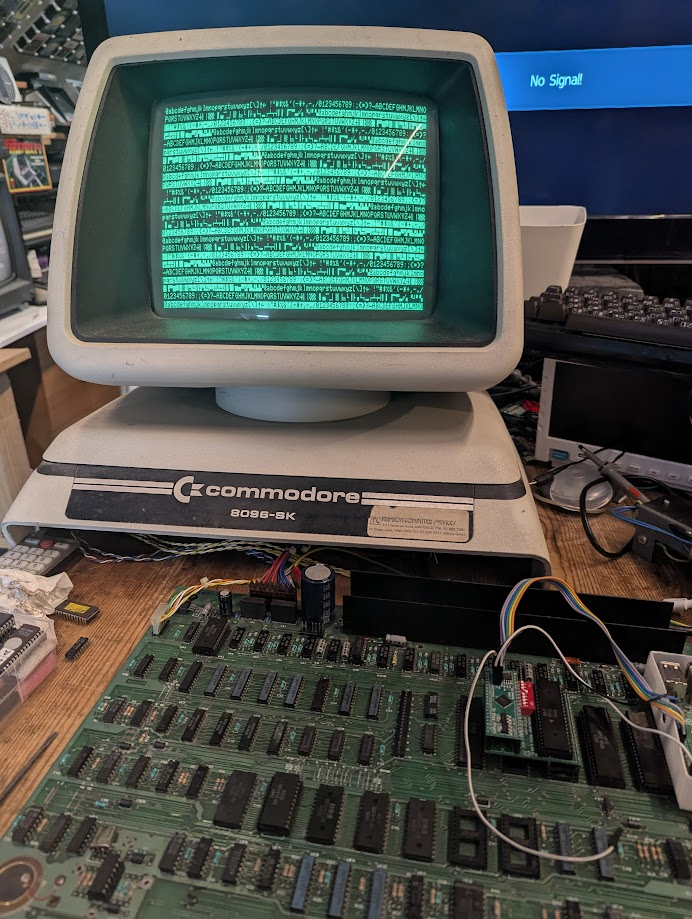
More good news the Vic 20 keyboard also works with a modified edit rom by SJ Gray. So much respect for his work. I can type!
I can now finally get into the monitor with the sys 1024 command which is valuable for more troubleshooting.
Just for giggles I decided to try a new video ram chip piggy backed on top of the existing ram chips which had no effect.
I also tried cooling each video ram chip with a can of duster I have. Cooling a chip can have an effect of temporarily recovering it. Still no effect until I tried a combination of chip cooling and a new chip piggy backed, turned on and….
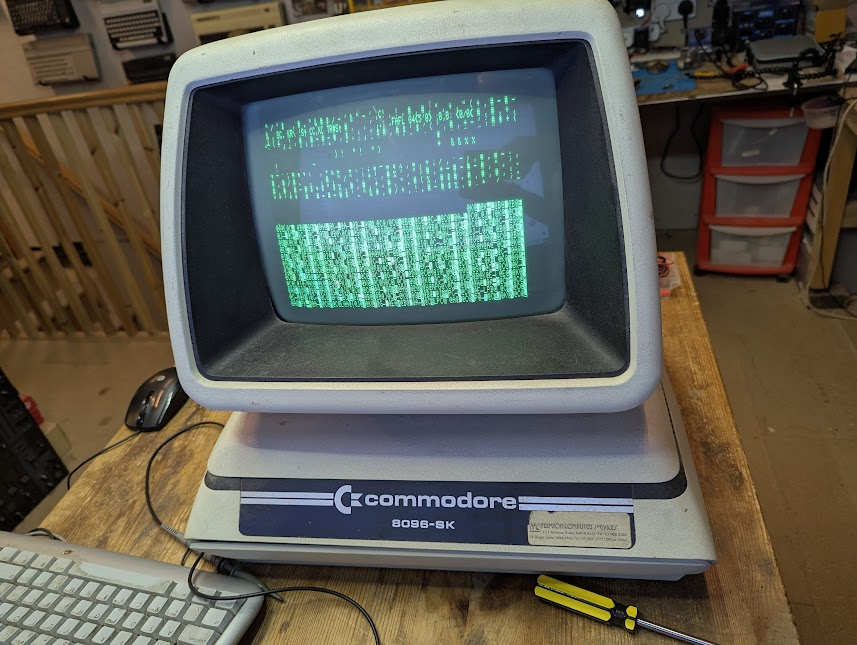
Woohoo!, a nice clean almost uncorrupted screen. I think i’ll socket this chip. This once dead Commodore Pet 8096-SK repair is taking shape..
This chip put up a real fight. It really did not want come out and I had to chop one of its legs off. Note to self don’t wang the soldering iron heat up to 390 or you’ll melt the pads and traces off the board. I was trying to remove a stubborn piece of solder from that leg and just adjusted the temp up too high then nudged a trace.

Luckily the pad was ok and the trace nudged back and soldered together. A little bit of liquid solder mask finished it off.
Continuity checked all the pads which tested ok. In with a new socket and chip.
Turned it on and…
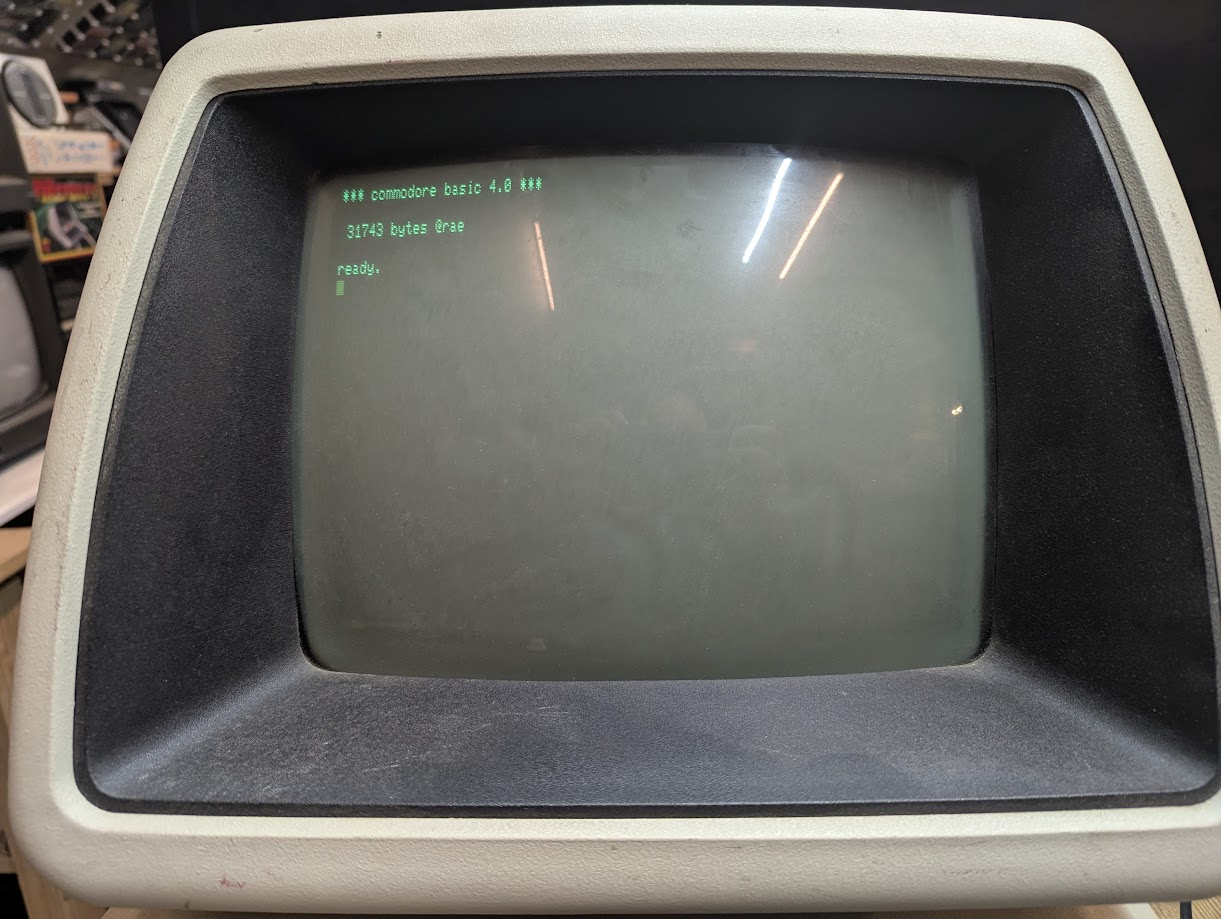
It was quite satisfying to get the uncorrupted screen but there is still an issue left to solve.
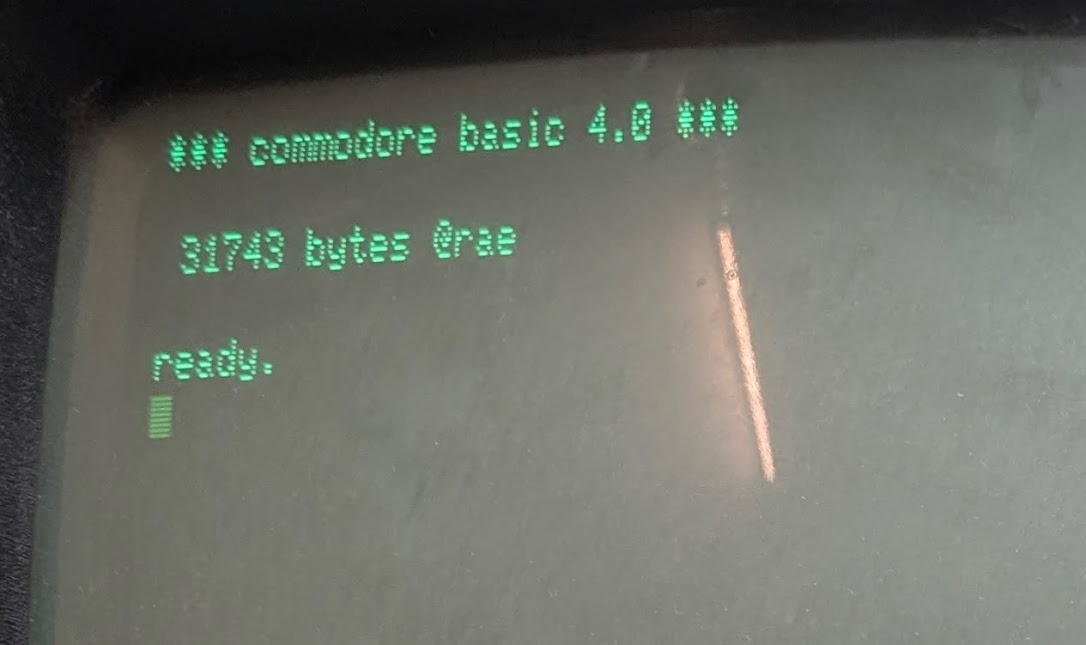
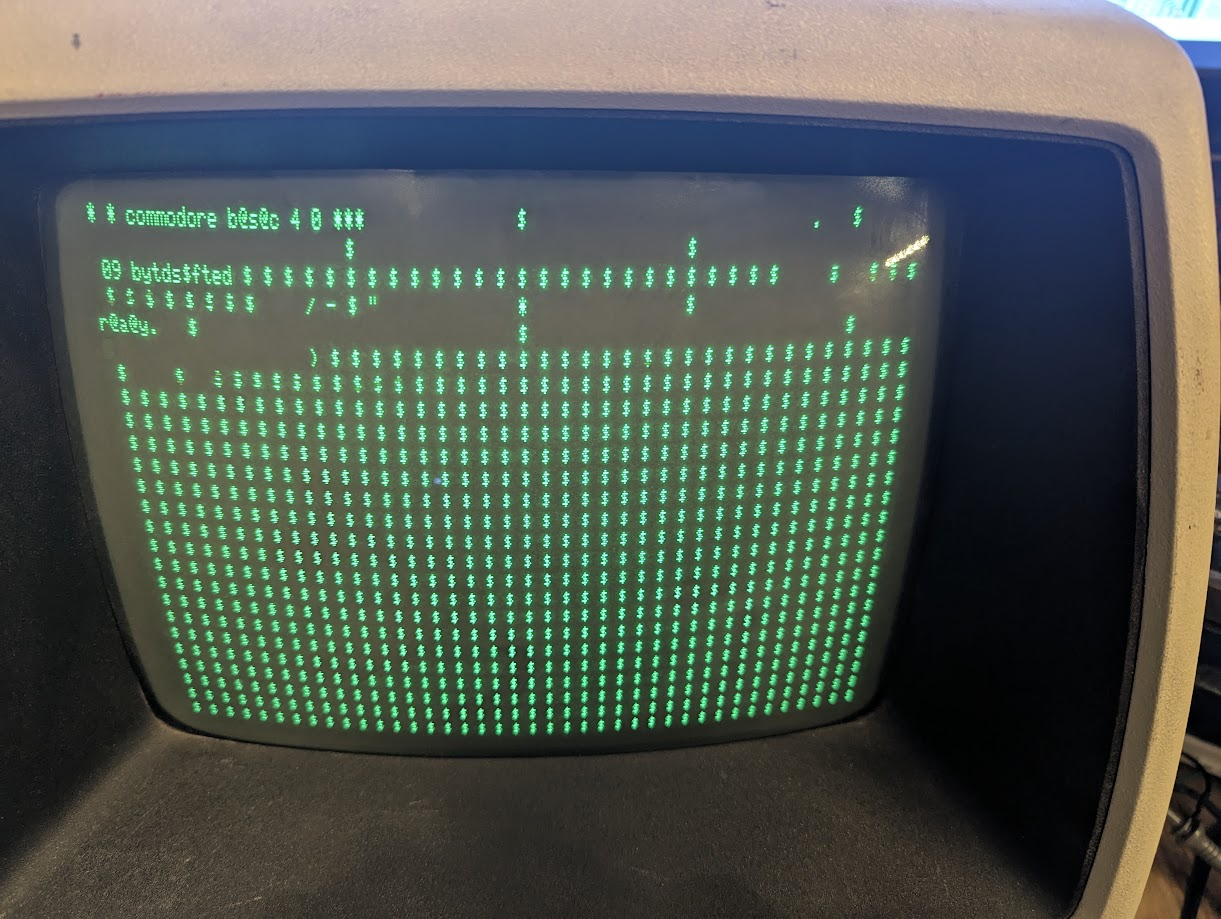
31743 bytes @rae. ‘@’ instead of ‘f’ and ‘a’ instread of ‘e’
Lets see what the pettest rom does.
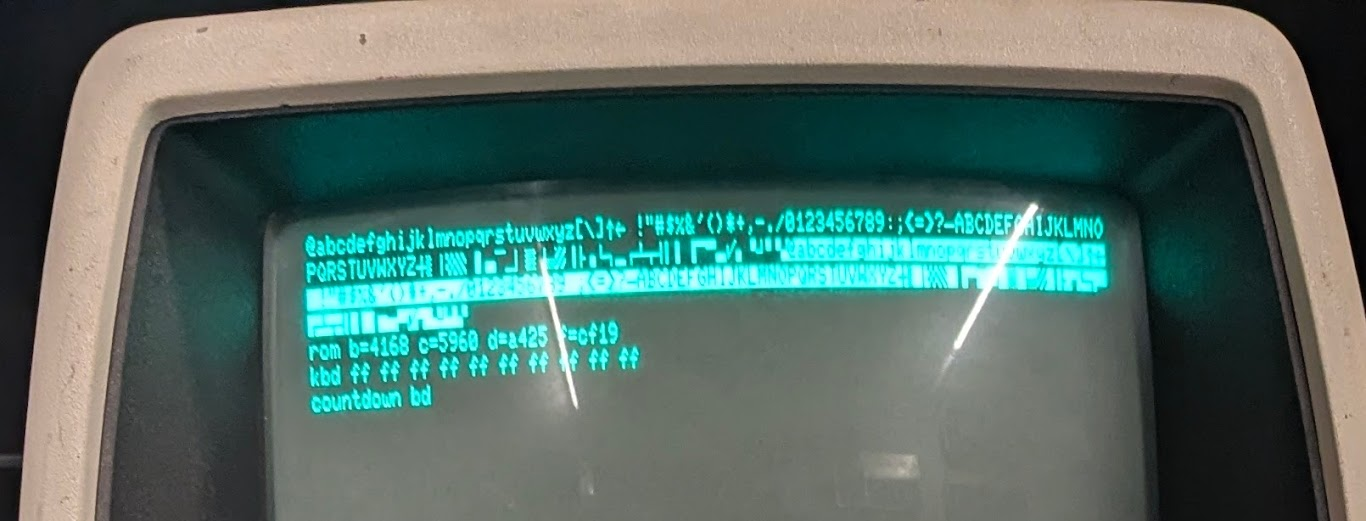
Looks different to the usual full screen of flickering characters.
It also proceeds to a second page.
It remains on this ram test page looping extra passes of the same test. At least it passes the ram test. Maybe this is being caused by the romulator some how.
I decided to remove the romulator.
All corruption is gone but sadly I can’t use the keyboard as the original edit rom expects the original keyboard which I don’t have. I need to write the C64 keyboard edit rom and I’ll create a diagnostic rom while I’m at it.
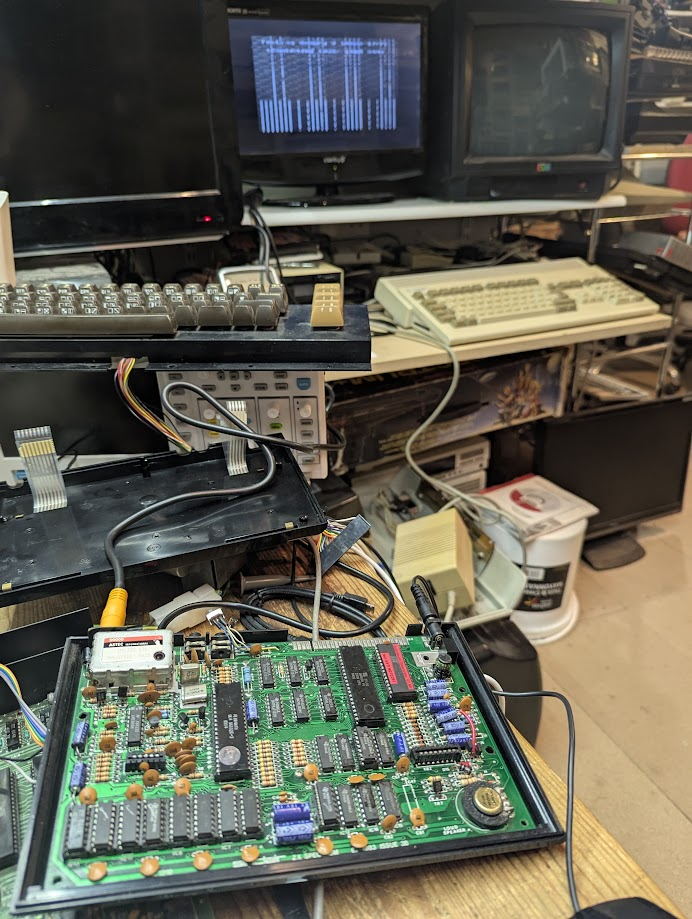
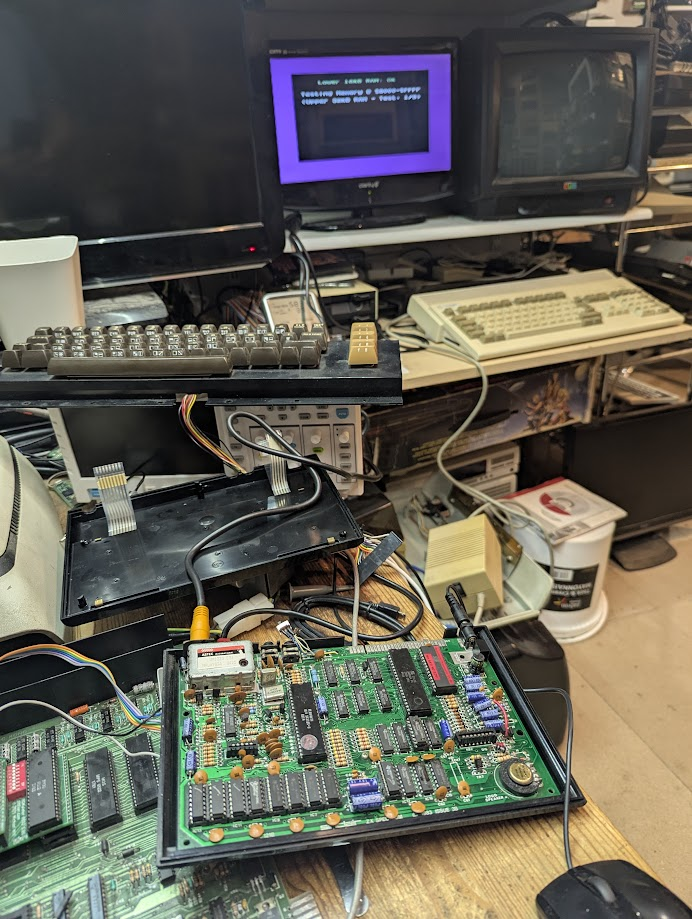
I next need to reassemble and see what happens when I reconnect the ram expansion.
Dead Commodore Pet 8096-SK Repaired
This serioulsy dead Commodore Pet 8096-SK Repair is almost done. Learnt alot from this project especially on how to use the Romulator to give life support to a dead machine.
In All Its Glory
Reassembled the machine and made a cable to interface a Vic 20 keyboard to the 25pin din plug at the fron of the PET. Works fantastic. I love the C64 Vic 20 keyboards. Perfect tactile feedback for me and great memories of typing on one of these for years as a kid.
Improvements
I may replace the original 4116 ram with 4164 ram. The 4116 and 4164 chips are nearly identical with two exceptions. 4164 ram chips only require a 5v supply so the -5v and 12v are redundant.
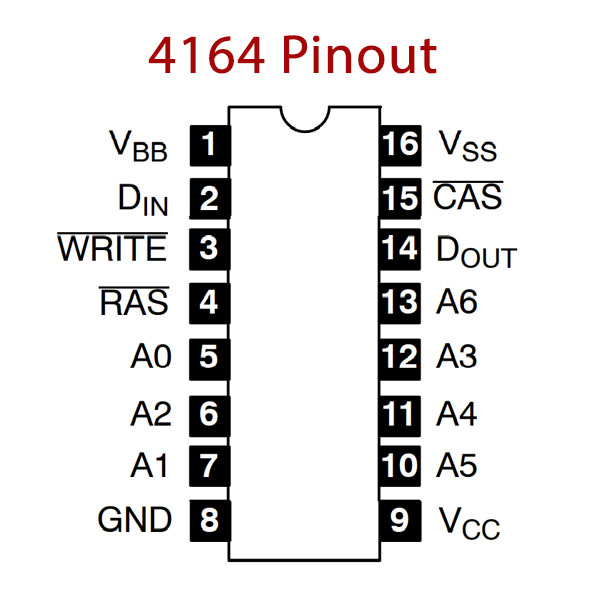
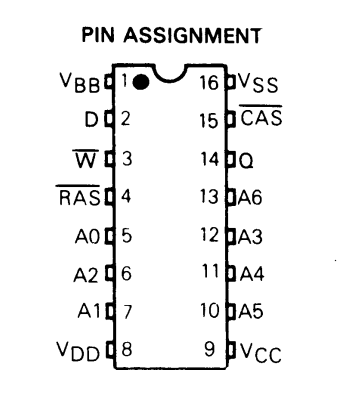
To replace a 4116 with a 4164 you cut off pin 1, and bend out pin 8, trim and jumper it to pin 9 you have a 4116 replacement that uses less power, lower heat and higher reliability.
Gameplay
Managed to connect up my SD2Pet and try a game.
Never thought I would see Defender on a PET but its really playable. Shame I’m so bad at it 🙂
Test a game!

